
Your First AI Translation
AI translation is a built-in three-stage pipeline: export CLIFF → translate with DeepSeek → import CLIFF. The model only produces translation text; every write still goes through the official FLocTextHelper and .locres generator, and entries that humans have already reviewed (reviewed / final) are never overwritten.
Before you start
- Complete a CLIFF export and import once to prove the pipeline works
- Obtain a DeepSeek API key (create one at https://platform.deepseek.com; it looks like
sk-…)
1. Open the plugin settings
Everything the plugin exposes is a UDeveloperSettings, so it lives in the official Project Settings window under the Plugins group. Three ways in, any one works:
- Edit > Project Settings → scroll the left list down to Plugins → expand CLIFF Localization Suite
- Edit > Plugins → find CLIFF Localization Suite in the enabled list → click the Settings (gear) icon on its row
- The toolbar Settings button → Project Settings → same as above
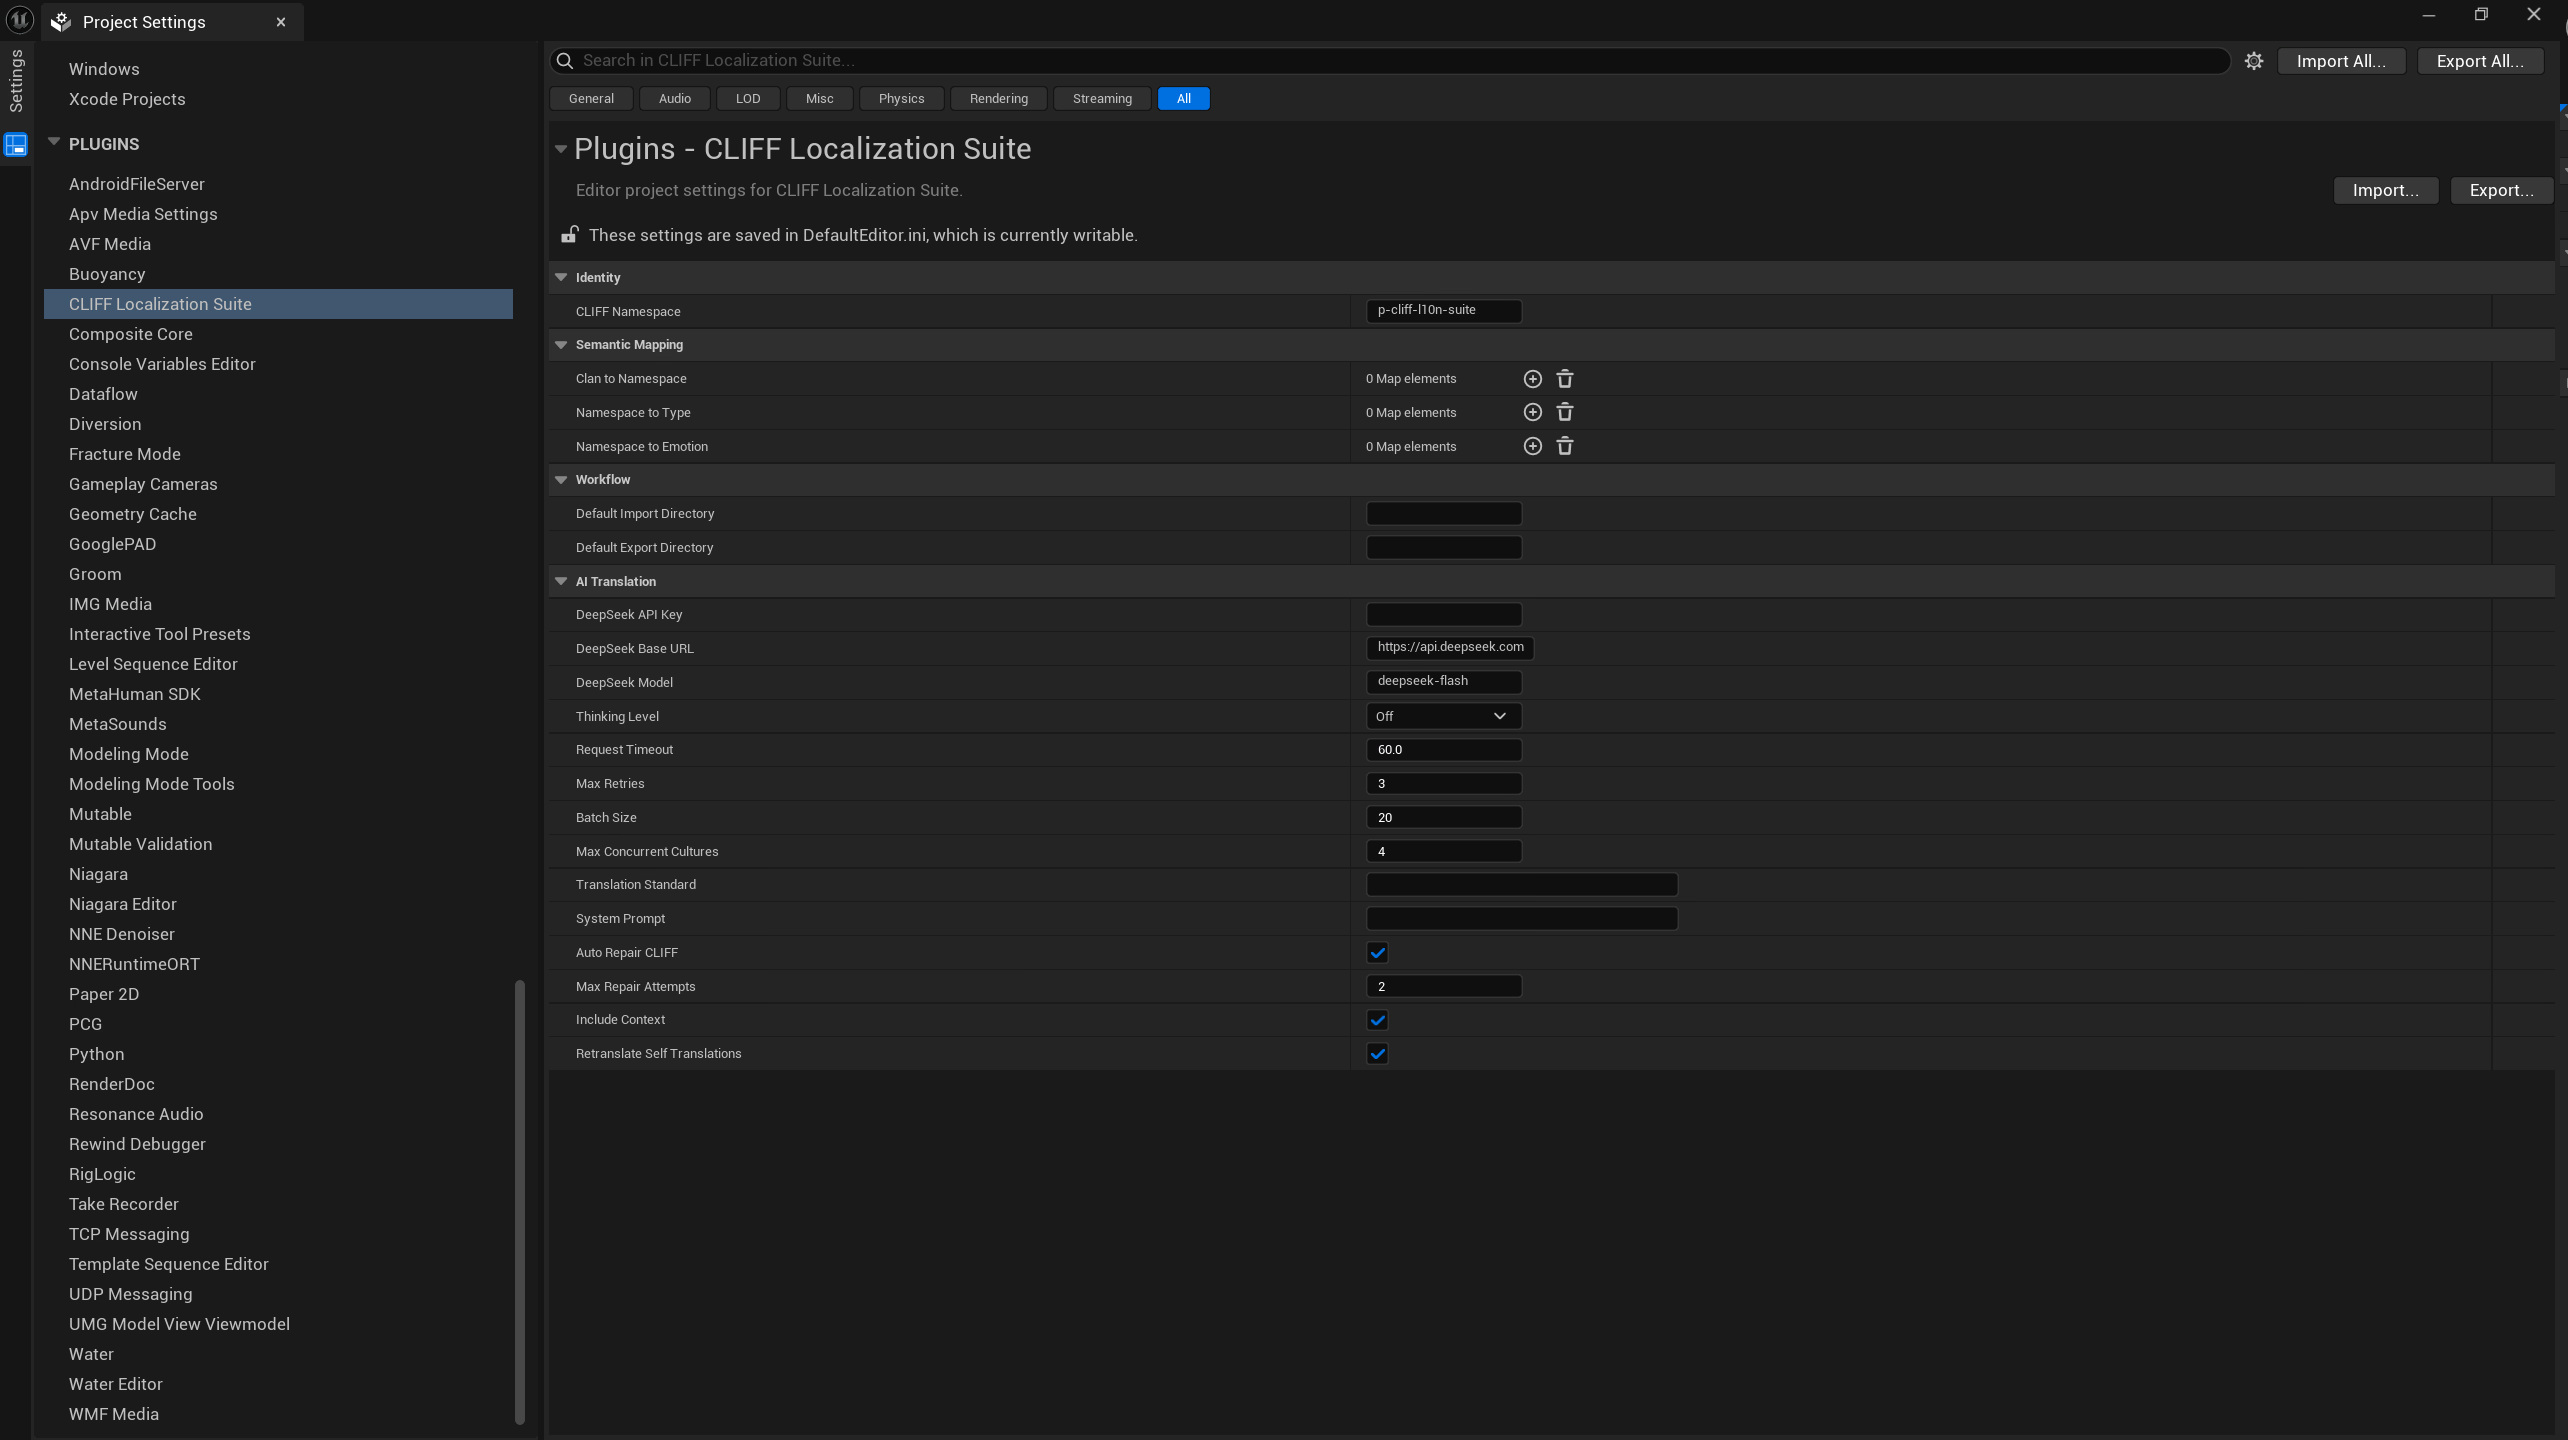
Expanding it reveals four categories on the left: Identity, Semantic Mapping, Workflow and AI Translation. AI translation only needs the last one.
2. Fill in the DeepSeek settings
Open the AI Translation category. The minimum configuration is three fields:
| Setting | Property | What to enter |
|---|---|---|
| DeepSeek API Key | DeepSeekApiKey | Your sk-…; it is a password field, shown as dots while typing |
| DeepSeek Base URL | DeepSeekBaseUrl | Defaults to https://api.deepseek.com; leave it alone when using the official service |
| DeepSeek Model | DeepSeekModel | Defaults to deepseek-flash; put a DeepSeek model name here to switch models |
The remaining parameters (Thinking Level, Batch Size, Max Retries, Max Concurrent Cultures, Translation Standard, System Prompt, …) can stay at their defaults for now; what they mean and how to tune them is covered in AI translation setup, and the complete field list is in the settings reference.
IMPORTANT
A change in Project Settings takes effect immediately — no editor restart needed; only an environment variable requires a restart (see below). The settings panel has no “test connection” button of its own; validate the connection with the console command in step 3.
Use an environment variable instead (recommended)
The environment variable wins over the setting field. When it is set, the key in the settings panel is ignored, which keeps the secret out of the repository:
# Windows: set a persistent per-user environment variable (takes effect in new terminals)
setx DEEPSEEK_API_KEY "sk-your-key"

# PowerShell: temporary, current session only (affects processes started from this window)
$env:DEEPSEEK_API_KEY = "sk-your-key"
Restart the editor afterwards. setx writes a user-level variable, so every process started later can read it.
WARNING
A key typed into the settings panel is written in plain text to
Config/DefaultEditor.ini(standardUDeveloperSettingsbehaviour), and that file is usually committed. Clear the field before committing and use the environment variable instead.
3. Verify the connection
Run this in any editor console (the Cmd box in Window > Output Log, or the console command line at the bottom):
CliffLocalizationSuite.AI.TestConnectionIt reads the key, sends a minimal request and reports success/failure, HTTP status, model name and elapsed time. With no key it prints:
AI 翻译缺少 DeepSeek API Key;请设置 DEEPSEEK_API_KEY 环境变量或插件设置。If it reports Failed together with an HTTP status, work through the key, base URL and network proxy using Troubleshooting.
Run a translation
-
Select a target in the Localization Dashboard
-
Click AI 翻译 on the toolb
-
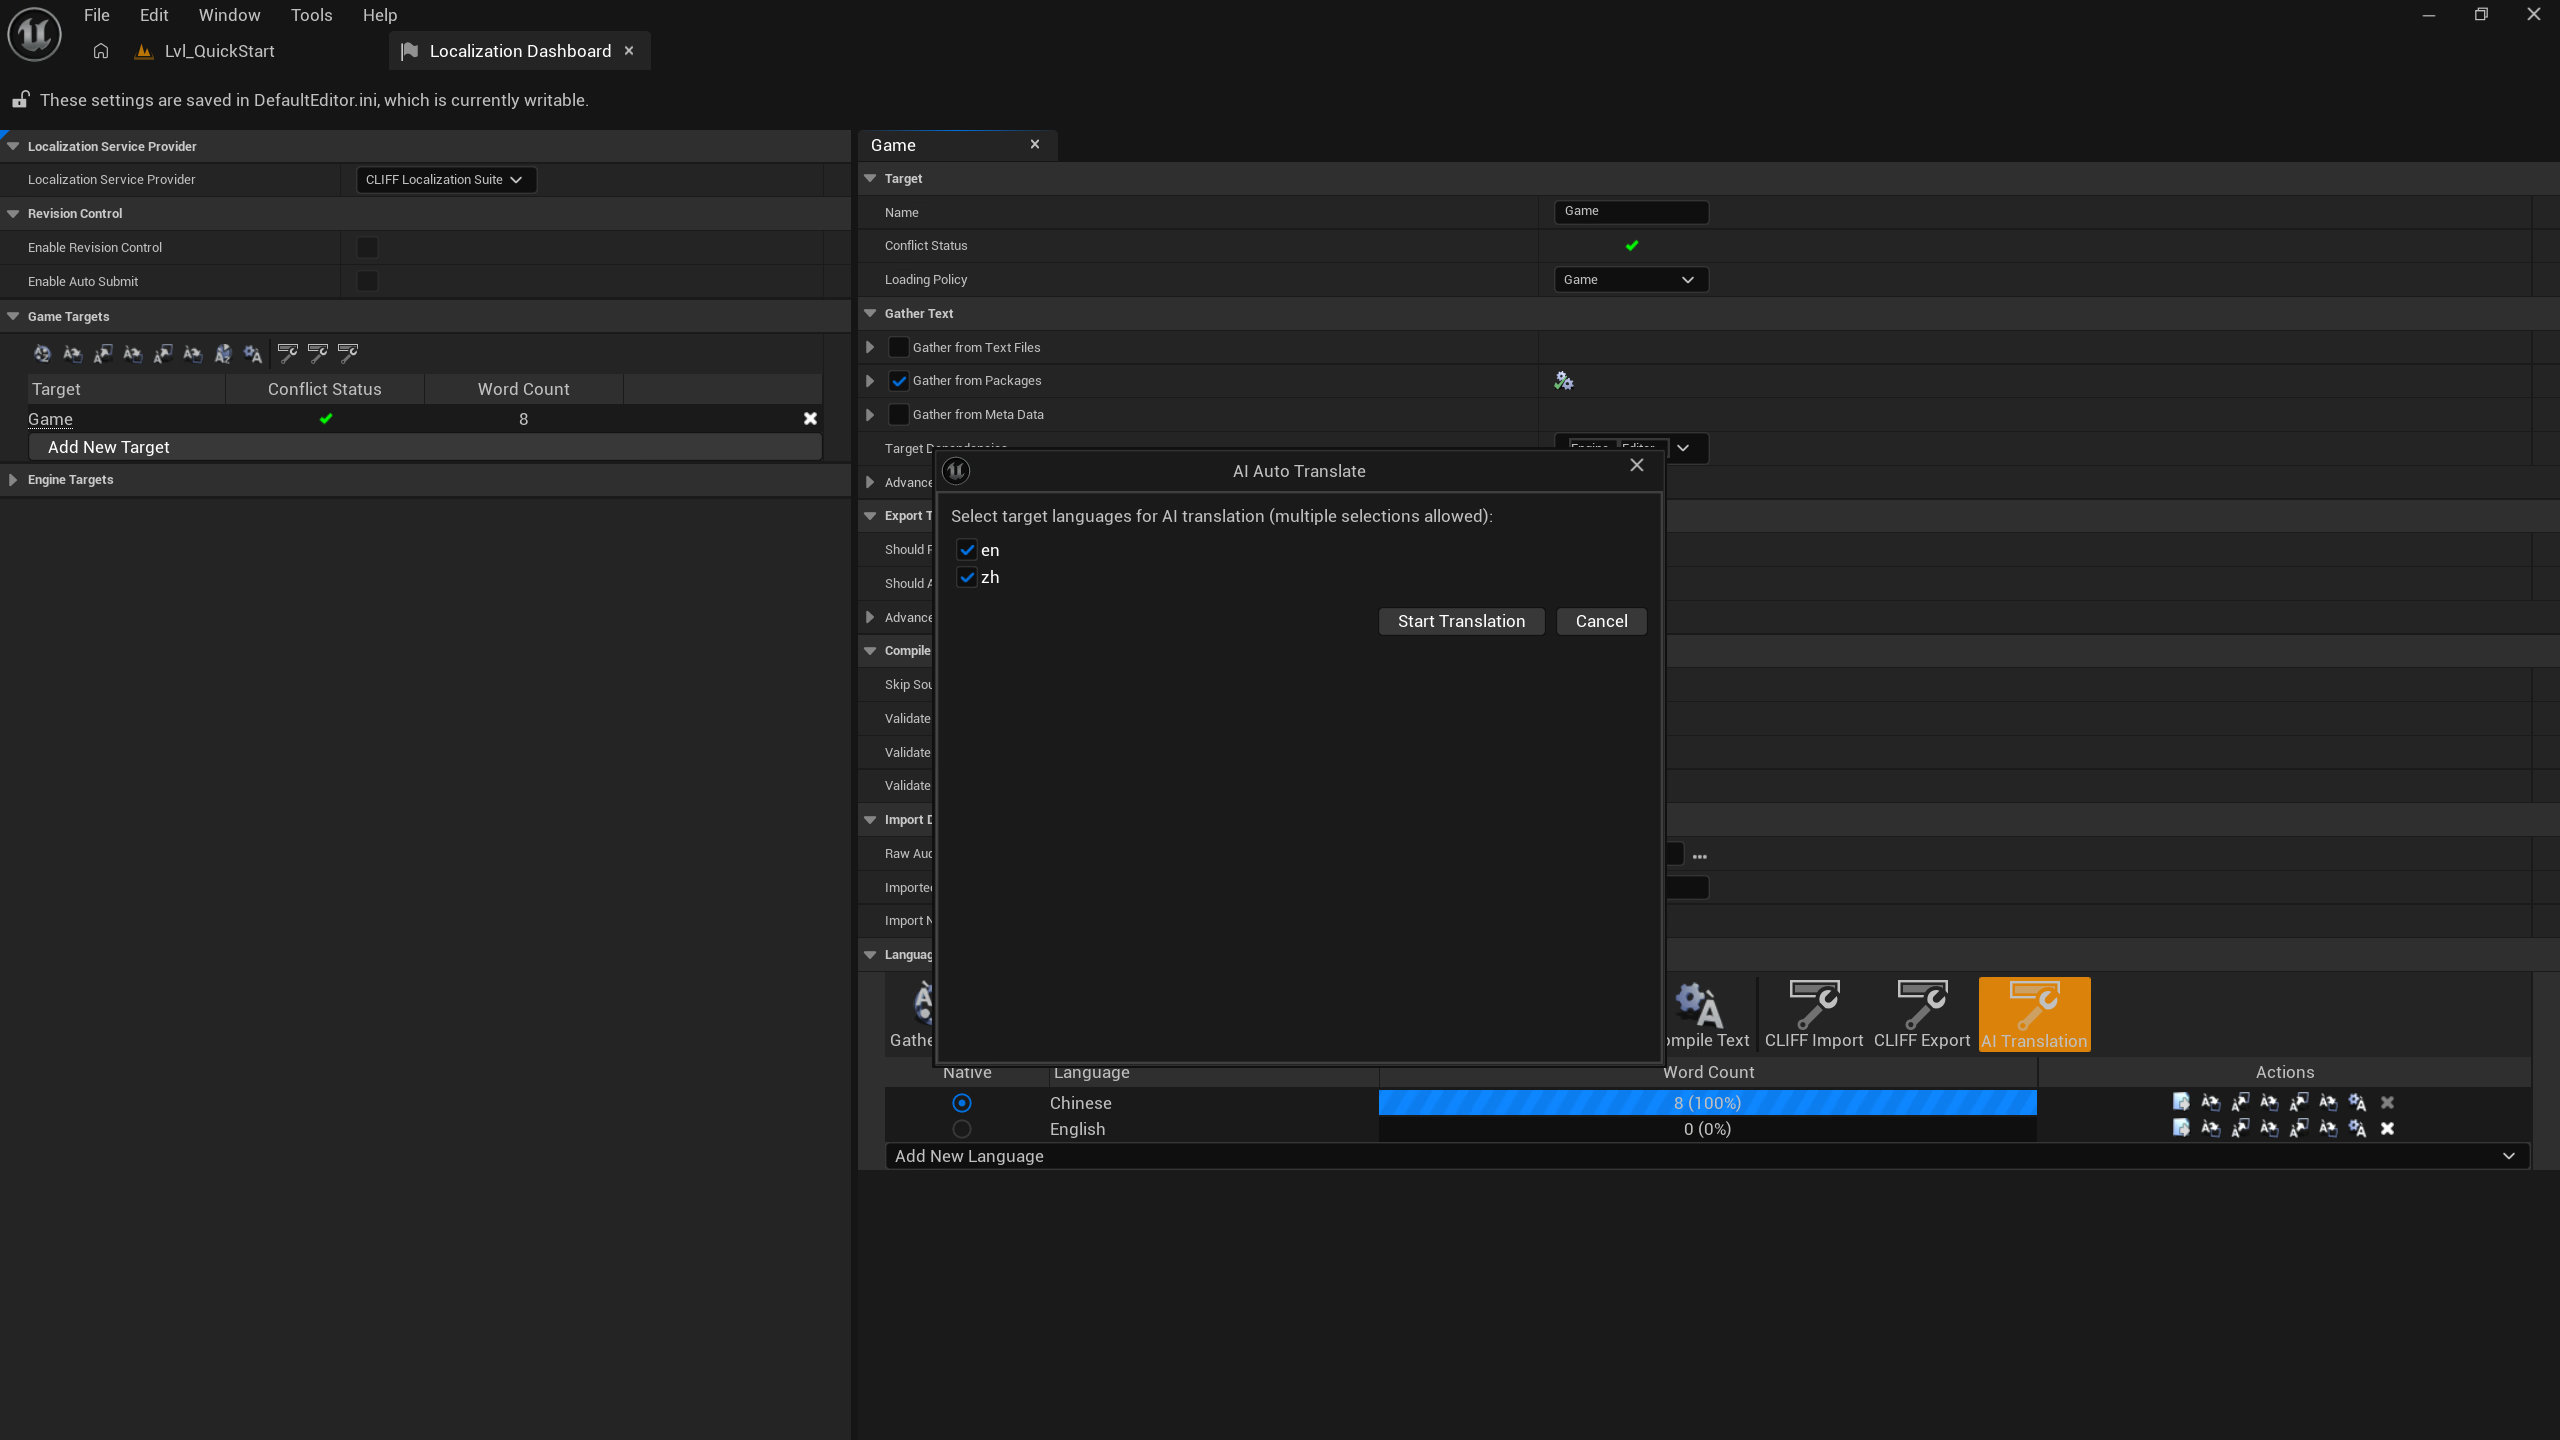
In the AI 自动翻译 window pick the target languages (multi-select; only the target’s non-native cultures are listed)
-
Click 开始翻译 — the official progress window runs four tasks in order:
Export Translations      export into Saved/CliffAITranslate/<Target>/
AI 翻译                  DeepSeek translates the entries without a target and writes the .cliff back
Import Translations      the official CliffImport step writes manifest / archive and compiles .locmeta / .locres
Generate Reports         the official word-count report, refreshing the Dashboard statistics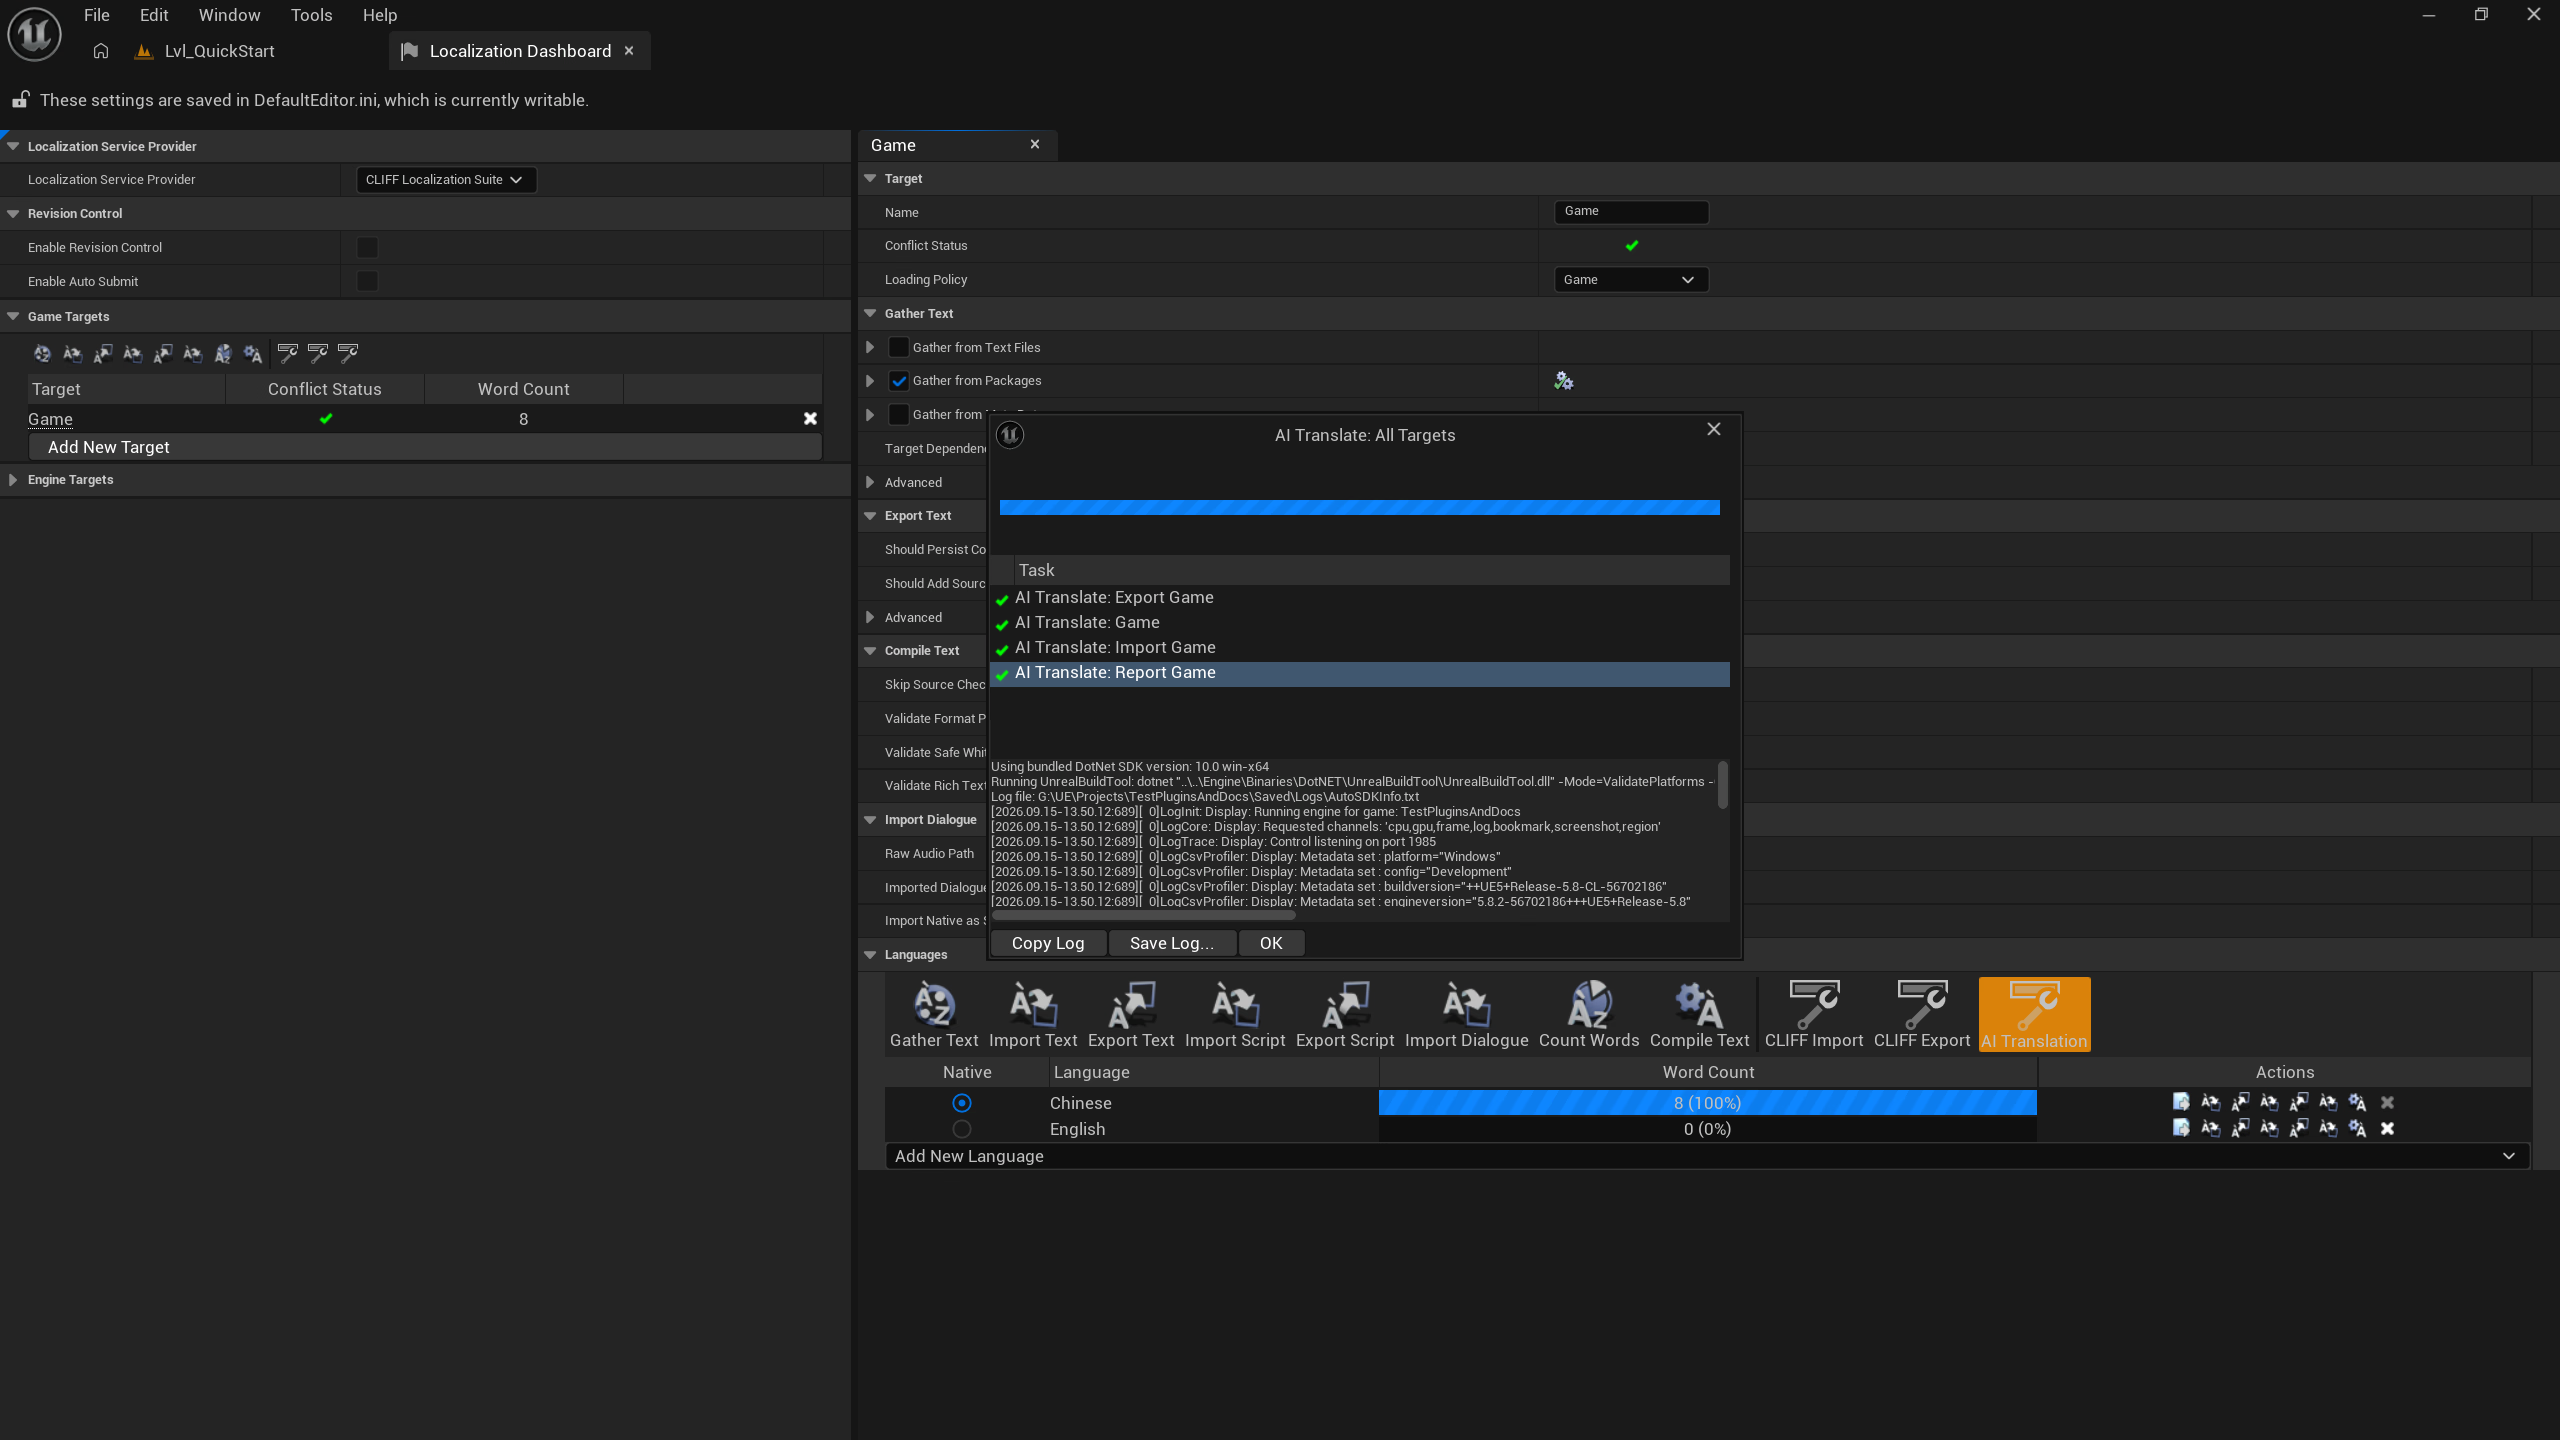
-
When it finishes the log prints the statistics (candidates / translated / skipped / failed / batches / repairs) and the Dashboard word counts refresh
NOTE
The working directory is
Saved/CliffAITranslate/<Target>/, wiped and recreated on every run. When the pipeline ends, the translated.clifffiles are copied back into the target’s data directory (Content/Localization/<Target>/), so the translations survive even if a later import step fails for an unrelated reason such as source control.
Which entries get translated
| Entry state | Sent to the model |
|---|---|
status: initial (no target) | ✅ translated |
no target field at all | ✅ translated |
status: translated where target == source and the text is not in the target language (a self-translation) | ✅ retranslated when Retranslate Self Translations is on (the default) |
status: translated / reviewed / final with a real translation | ⛔ skipped, never overwritten |
reviewed / final (human-approved or locked) | ⛔ never touched |
The native culture is never translated. Several target languages may be selected at once; each language gets its own conversation and runs concurrently (capped by Max Concurrent Cultures, default 4).
Command line equivalent
CliffLocalizationSuite.AITranslate <targetName> <culture1,culture2,...>For example:
CliffLocalizationSuite.AITranslate Game ja,ko,zh-HansThe model, key resolution, batching and retry behaviour are identical to the GUI. The key is never passed on the command line — it is read from the environment variable or the plugin setting.
Checking the result
- Log: the progress window streams per-file results;
Copy Logcopies the whole log andSave Log...writes it to disk - CLIFF intermediate files:
Content/Localization/<Target>/<Culture>/<Clan>.cliffnow carriestargetvalues andstatus: translated, ready for review or external tooling - Translation Editor: open Window > Localization > Translation Editor and confirm the translations are present with no spurious “needs review” flags
- PIE: launch PIE and confirm the UI switches language
TIP
Trying it out? Select a single culture in the AI translation window, set Batch Size low (say 5) and Max Retries to 1 to validate the prompt and terminology on a small sample before running the whole project.
Those fields live in Project Settings, not in the AI translation window — go back to step 1 to change them.