
Creating Custom Animations
This section walks you through authoring your own text animation from zero: create an animation Blueprint asset → add glyph animations → override BuildDefaultAnimation → play it in UMG.
TIP
If you have not used the built-in presets yet, complete”Using Preset Animations”first to get familiar with the widget and playback flow, then return here.
Creating a Text Animation Blueprint Asset
Applies to: starting your first custom animation Blueprint asset.
UTextAnimationBlueprint is Texturge’s core authoring asset. Each animation Blueprint holds a set of UGlyphAnimation curve assets, and the Blueprint variables declared by the designer become animation parameters (this is how preset parameters like Duration / Glyph Delay are implemented).
-
Right-click in the Content Browser → Texturge category → Text Animation Blueprint (
UTextAnimationBlueprintFactory)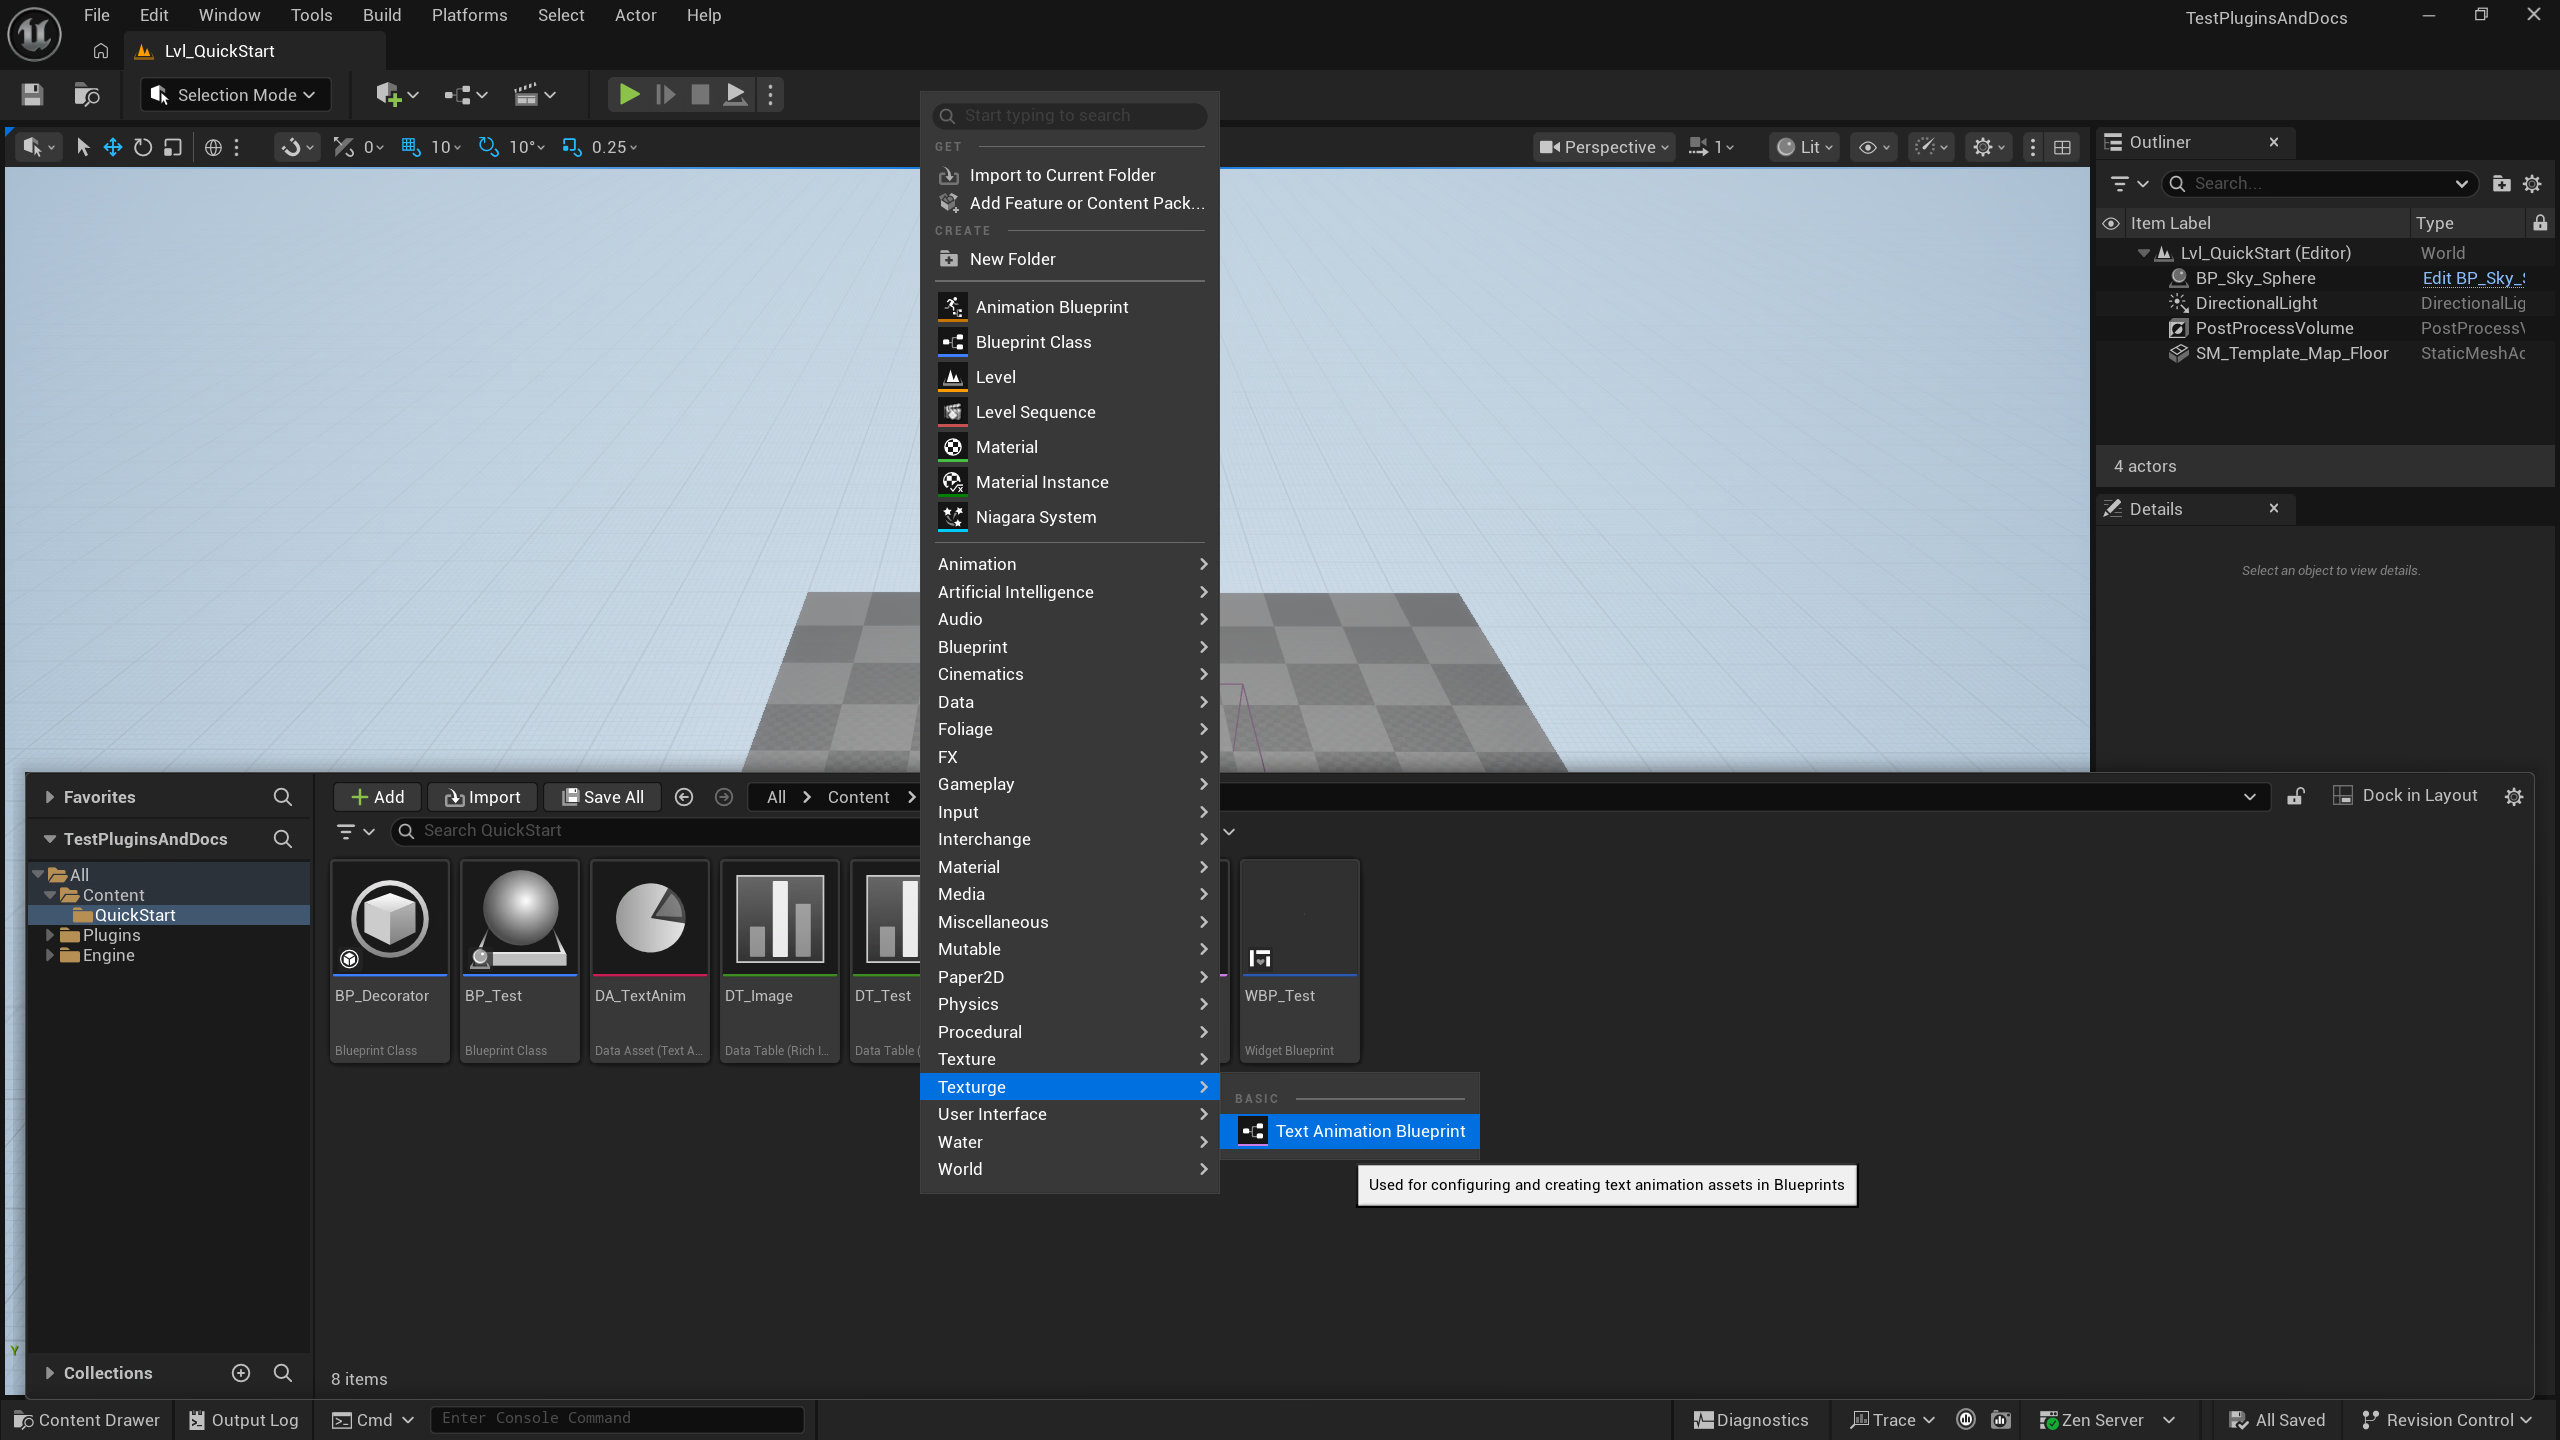
-
Name the asset, e.g.
TABP_Test -
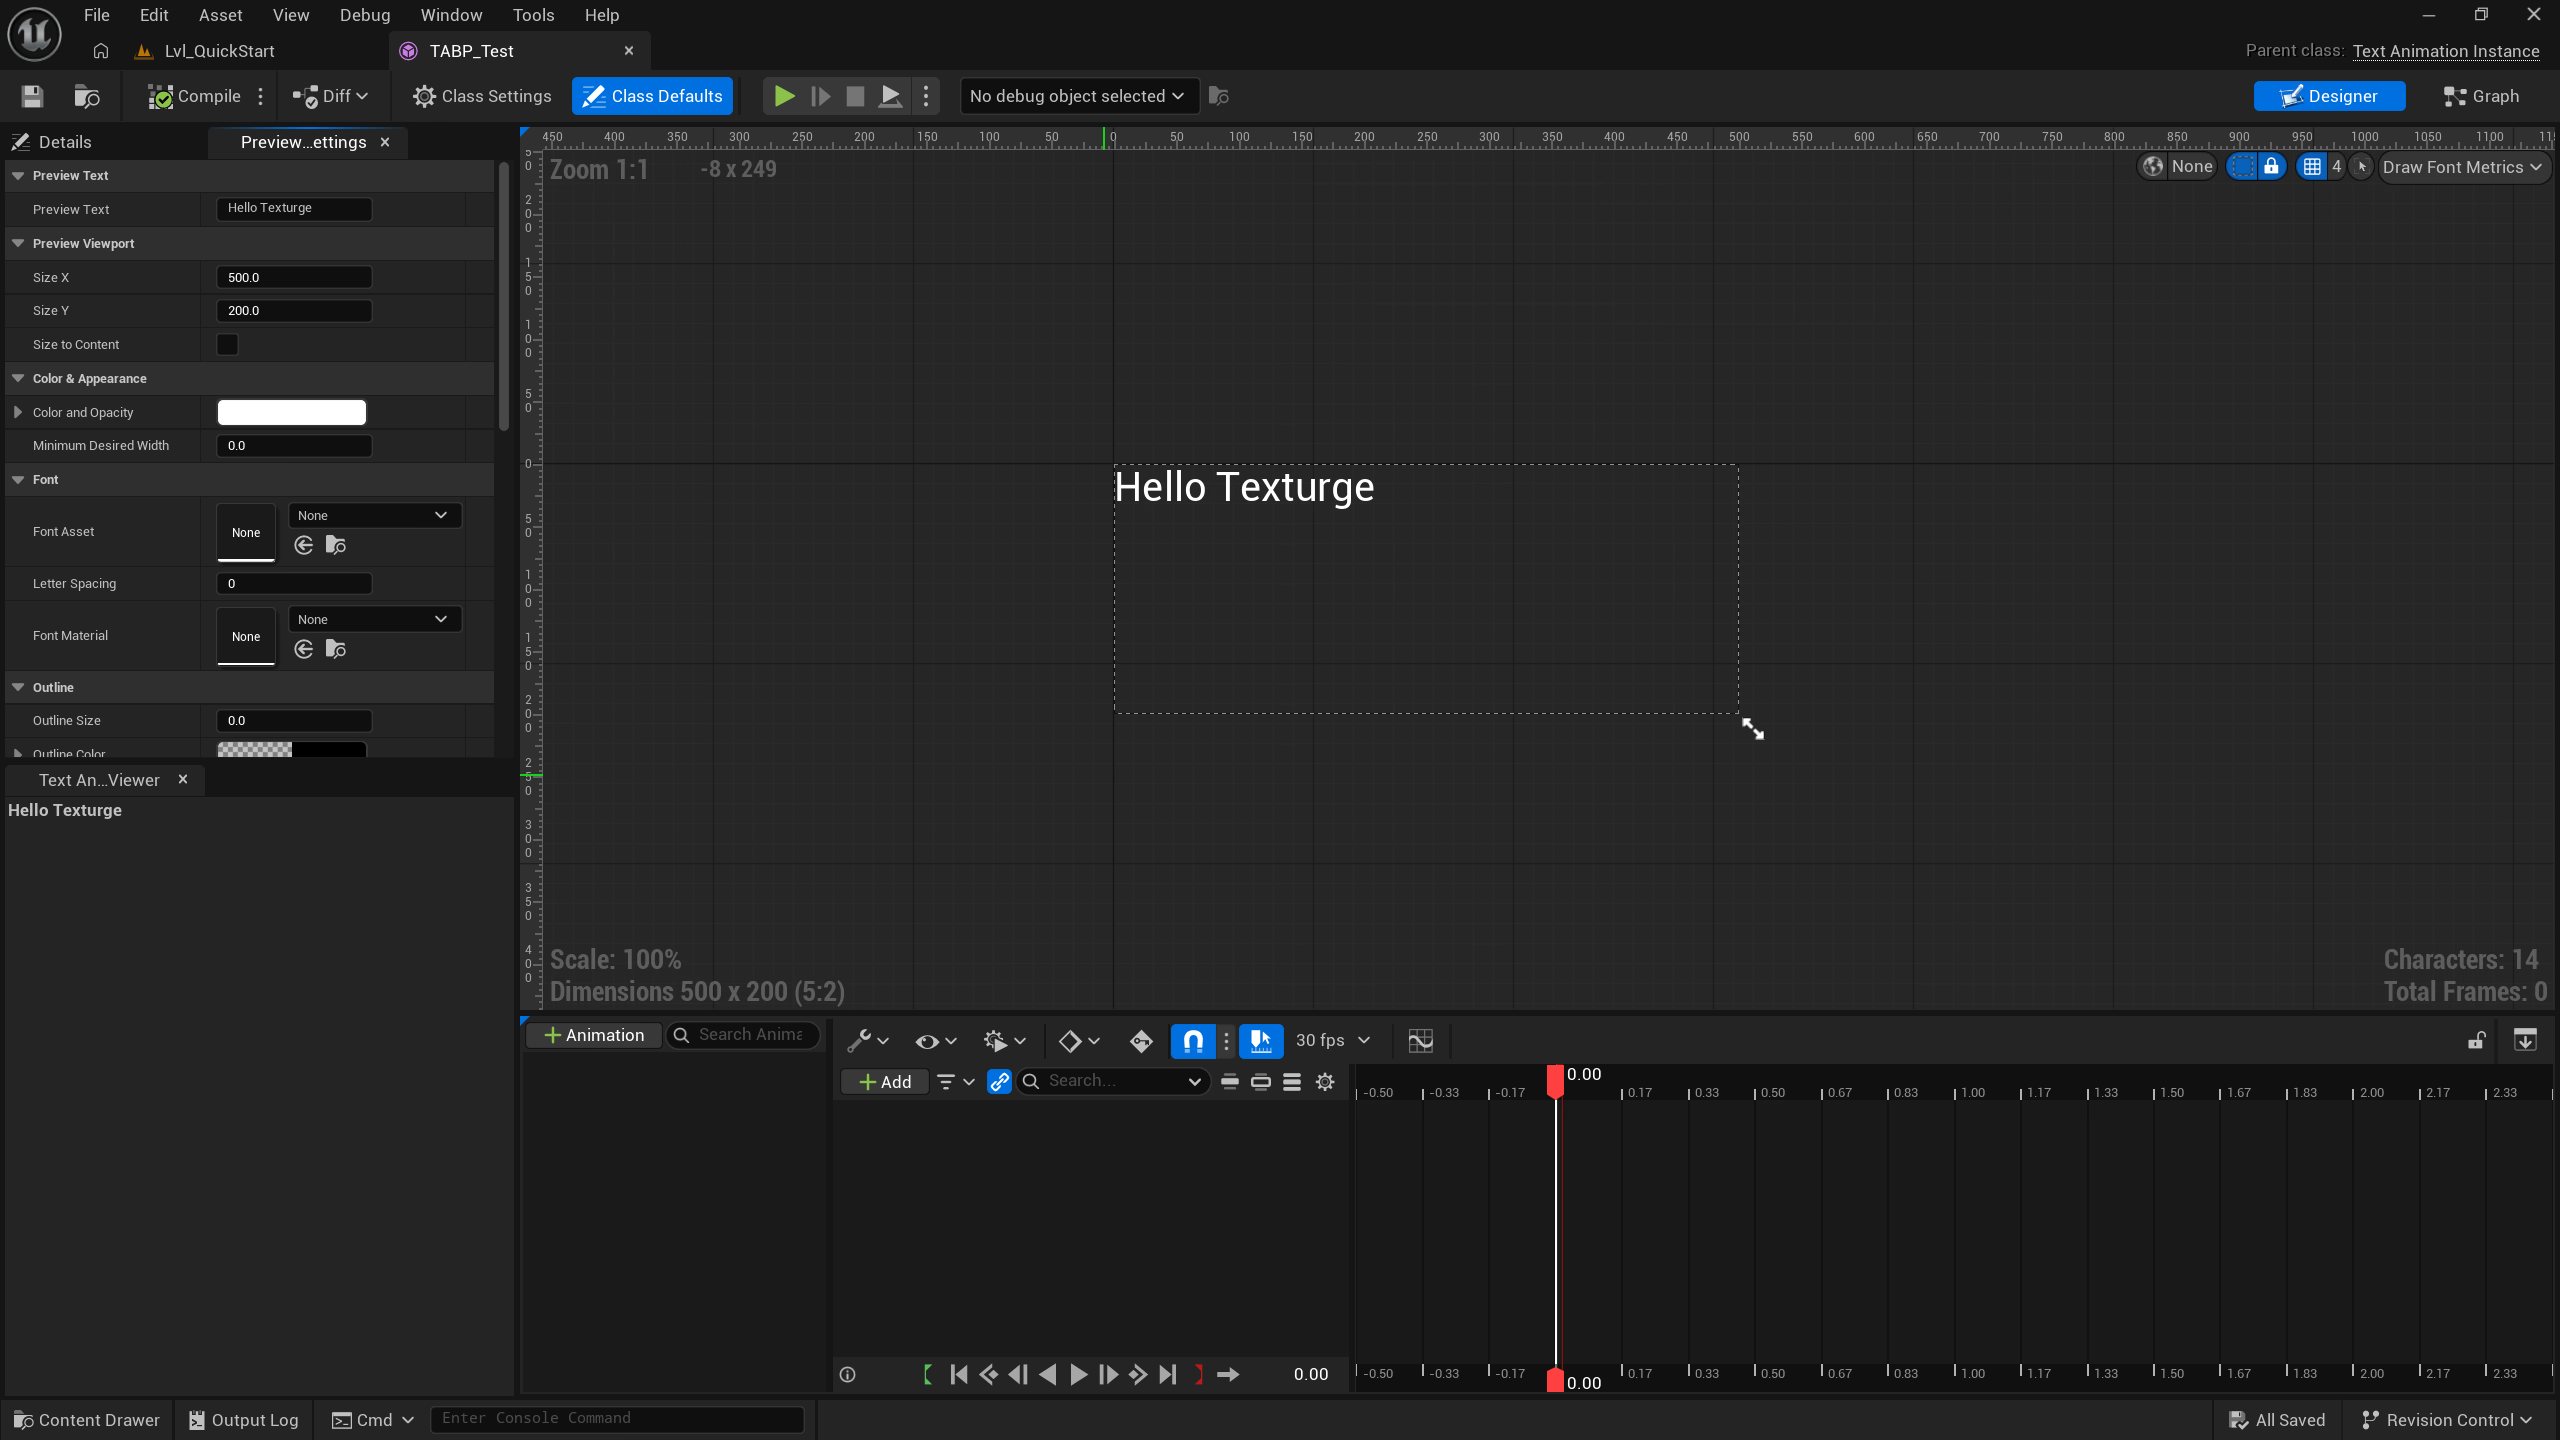
Double-click to open the text animation Blueprint editor
Getting Familiar with the Editor
Applies to: understanding each panel when you first open the editor.
FTextAnimationBlueprintEditor provides Designer / Graph dual modes and 7 tabs:
| Tab | Description |
|---|---|
| Designer (AnimationDesigner) | WYSIWYG design viewport (STextAnimationDesignerView) with zoom/pan/grid/font metrics |
| Animation List (PreviewAnimationList) | Preview animation list (STextAnimationPreviewList) |
| Timeline (Timeline) | Sequencer integration (UGlyphAnimation keyframe editing) |
| Details (Details) | Blueprint details panel |
| Preview Settings (PreviewSettings) | Preview parameters (text/font/viewport size) |
| Track List (TrackList) | Legacy track list (compatibility) |
| Preview Viewport (PreviewViewport) | Preview text animation widget |
Adding a Glyph Animation Asset
Applies to: adding keyframe curve assets to an animation Blueprint.
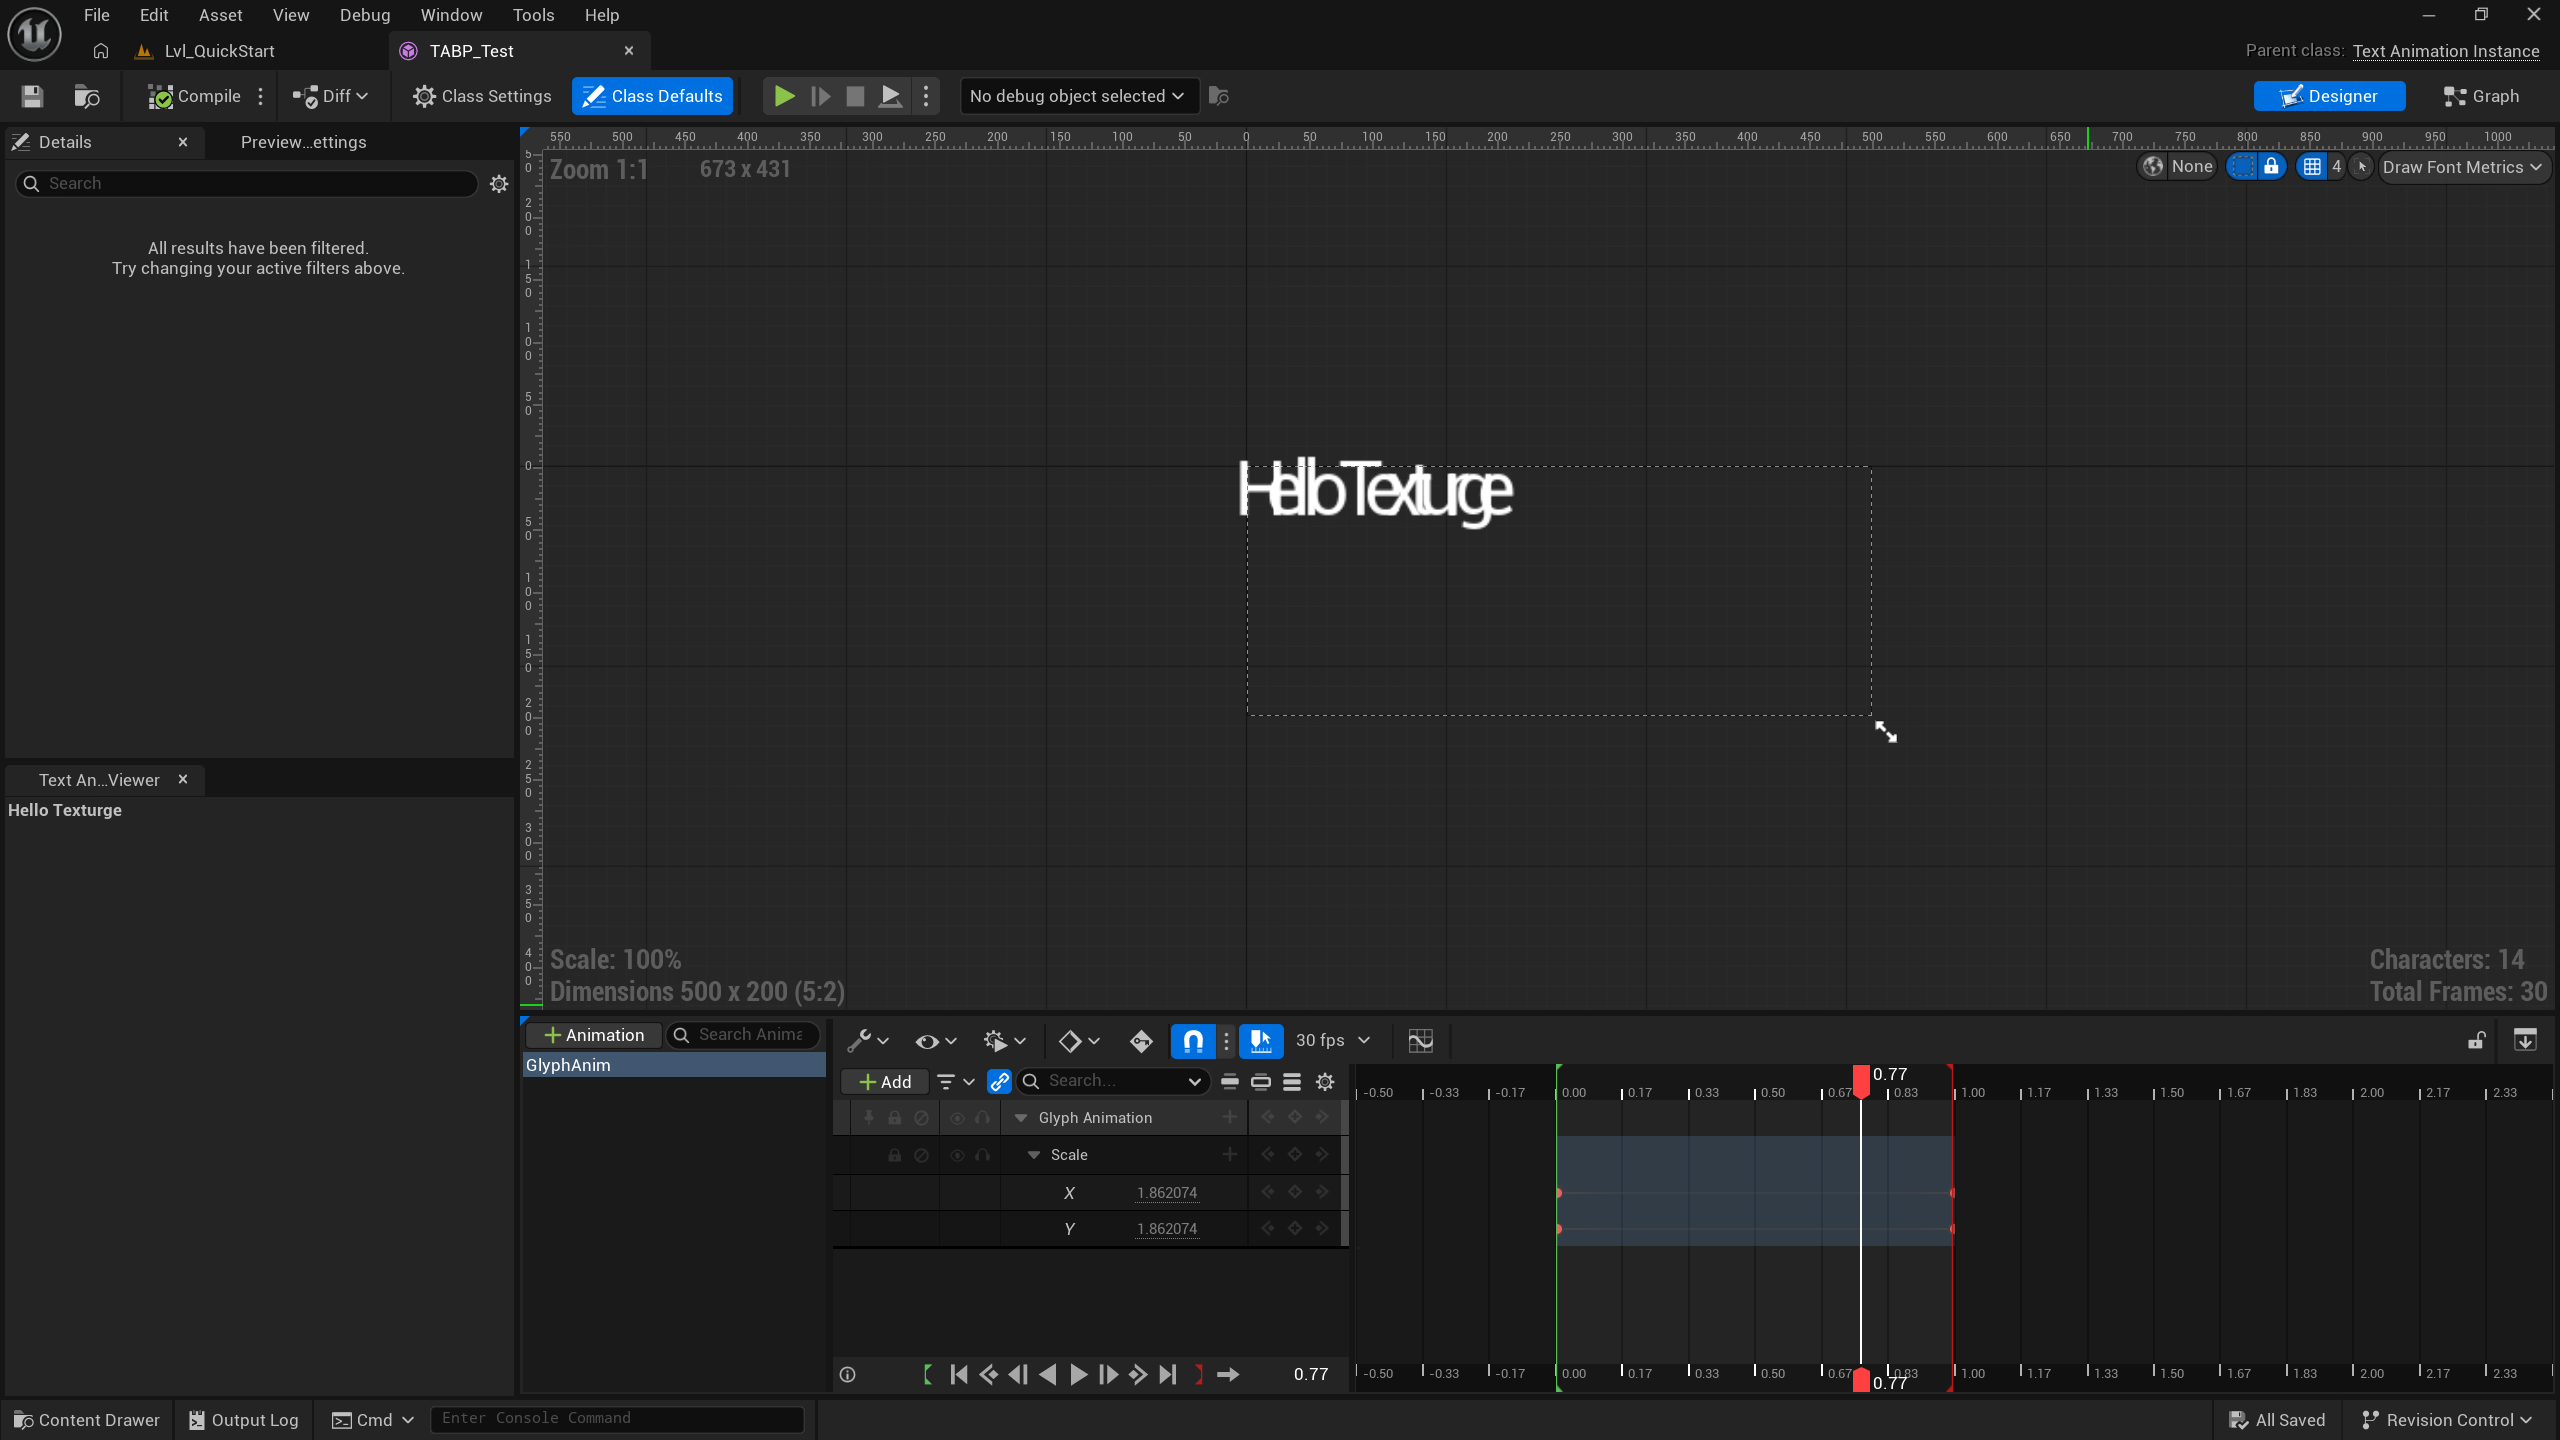
UGlyphAnimation is a UMovieSceneSequence subclass storing 21 channels of keyframe curves.
-
In the Animation List panel, click + to create a new glyph animation asset (
UGlyphAnimation, or select an existing asset)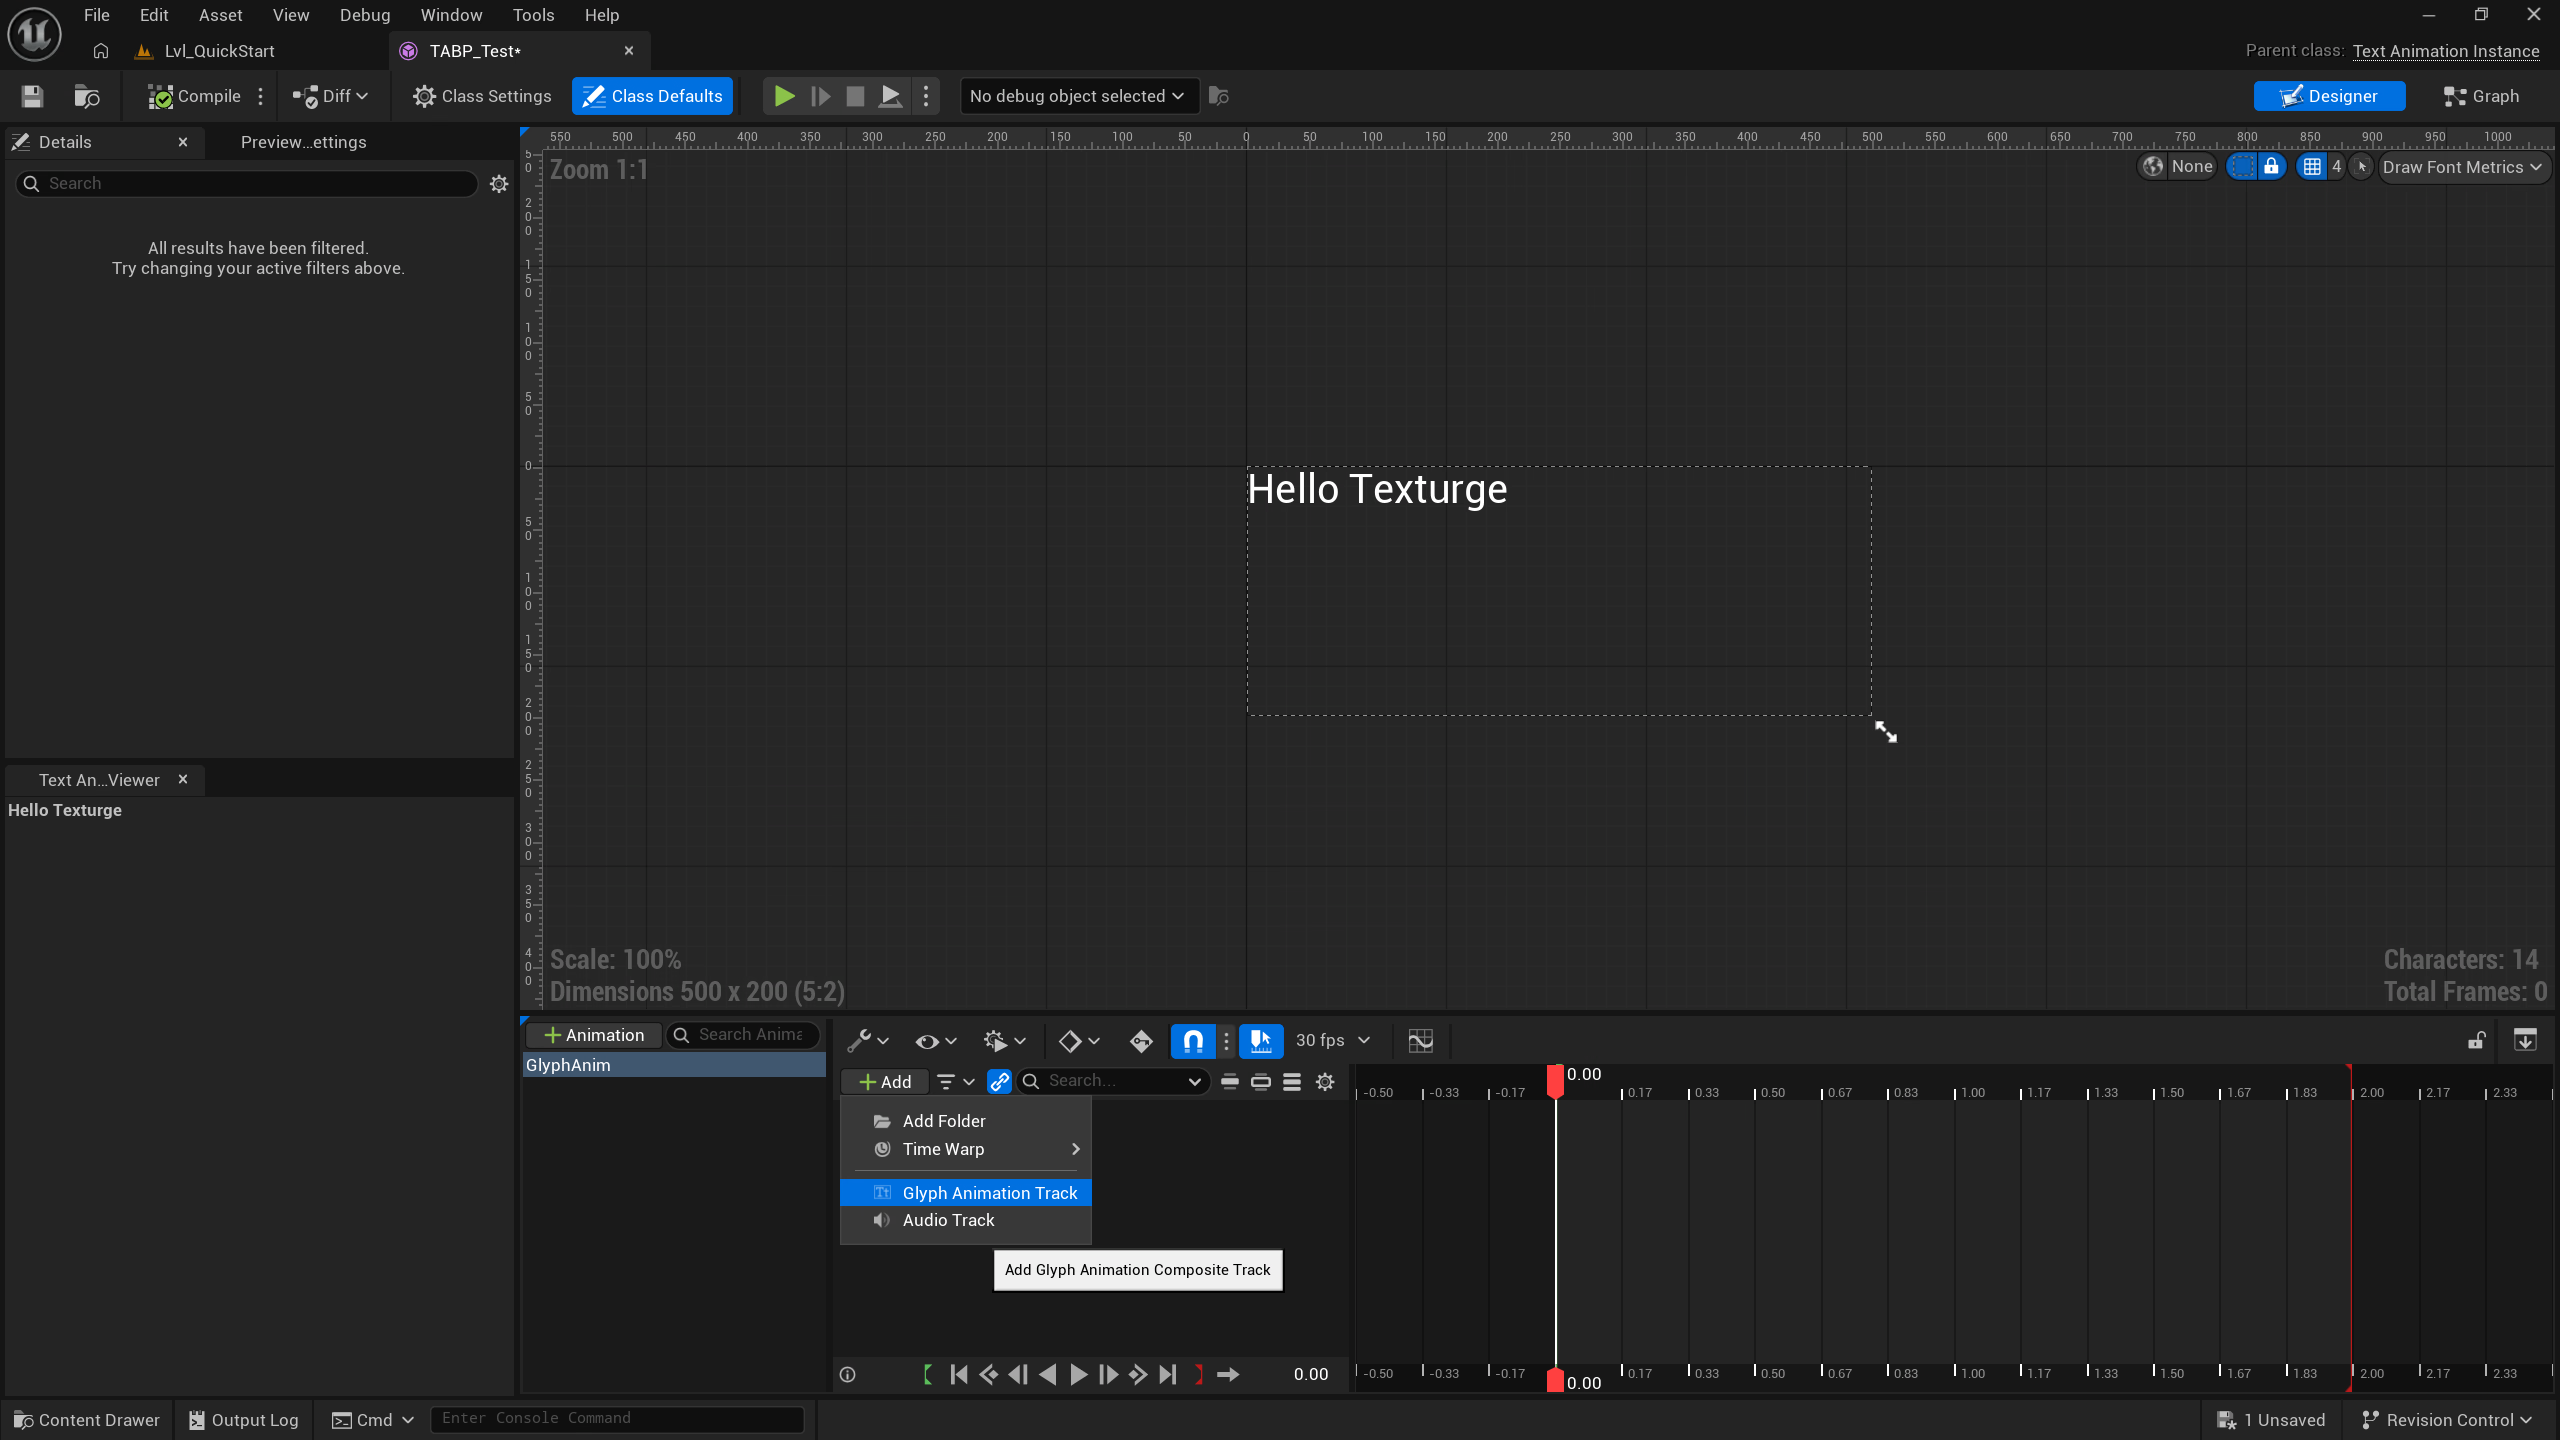
-
Double-click the asset to open it in the Timeline Sequencer
-
First add a glyph animation track (Glyph Animation Track) in the timeline as the container for sub-tracks
-
Click the + at the top-right of the track to add concrete sub-tracks (10 types: Opacity / Translation / Scale / Tint, etc.)
-
Add keyframes on the sub-track’s FloatChannel and adjust curves (a 1-second key axis is the preset convention)
TIP
The editor preview defaults to the
"Hello Texturge"preview text (UTexturgePreviewSceneConfig::PreviewText), which can be changed in the Preview Settings panel.
Building the Default Animation
Applies to: normal custom animation creation. You need to override BuildDefaultAnimation; otherwise you only get the default baked result of a single GlyphAnimation.
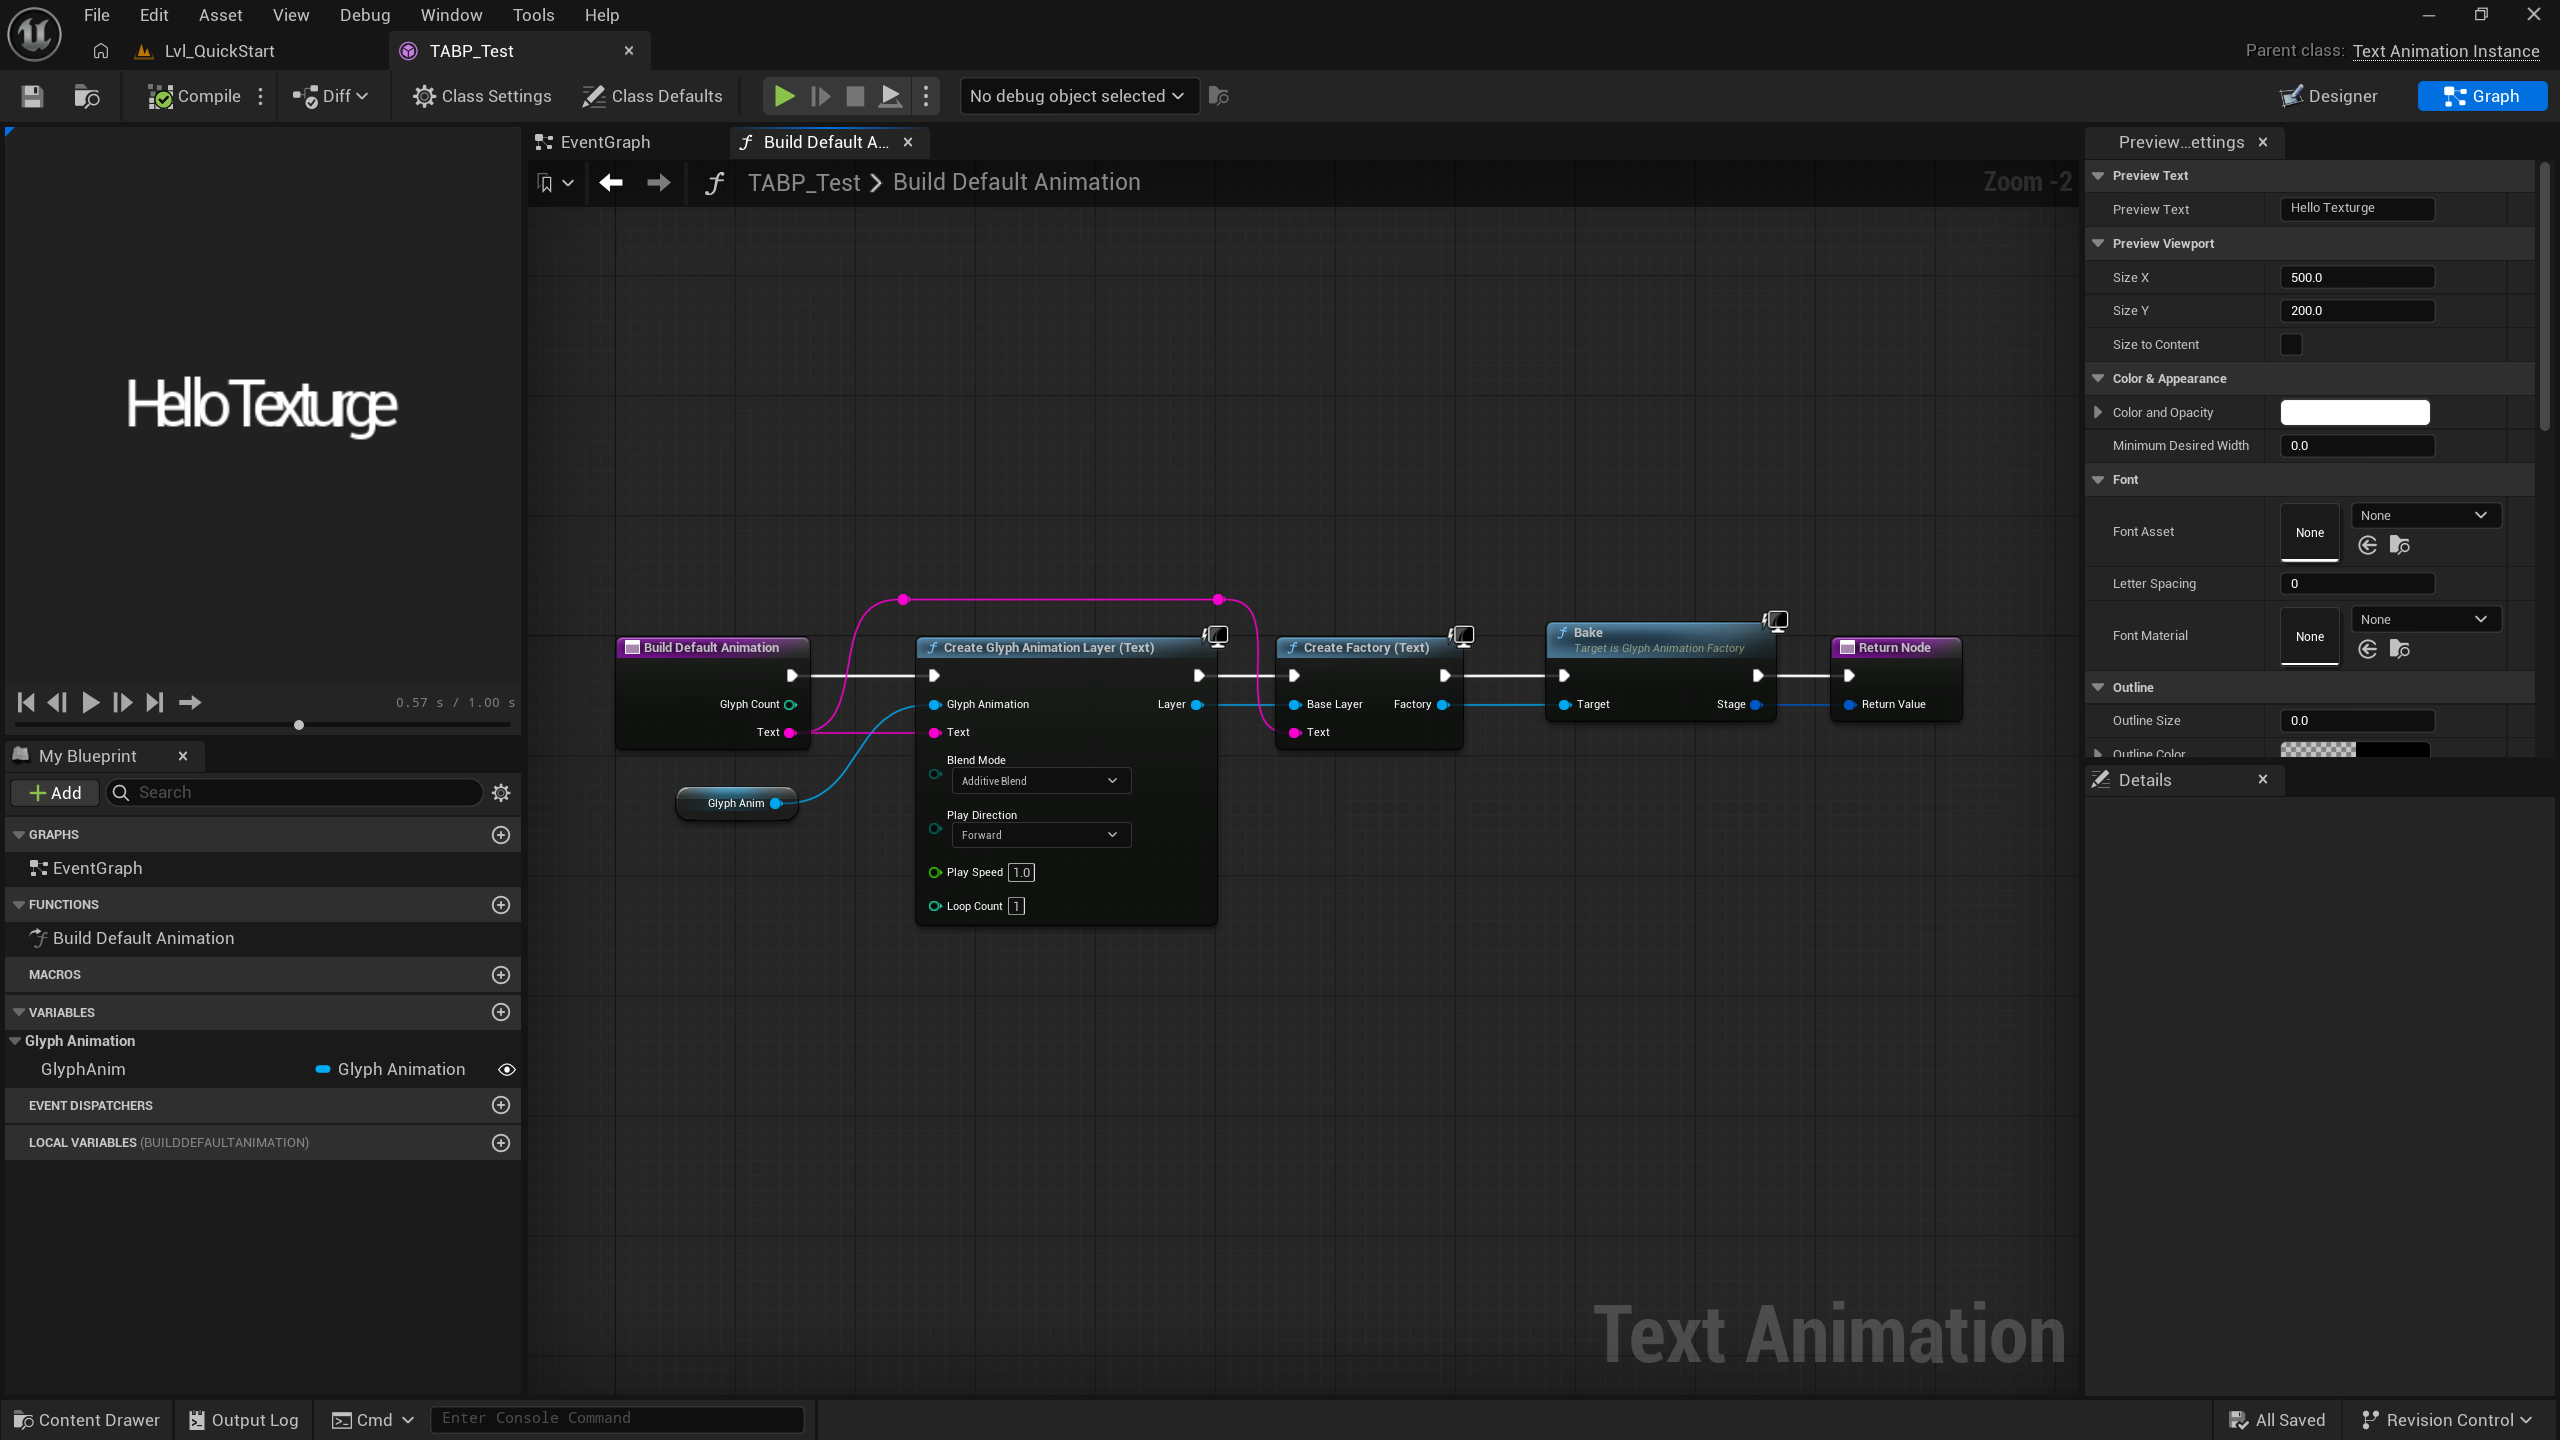
BuildDefaultAnimation is a BlueprintNativeEvent on UTextAnimInstance, called by FAnimationCompiler::BakeAllStages during baking. Overriding it gives you control over curve assets, scheduling, layer composition, and factory post-processing.
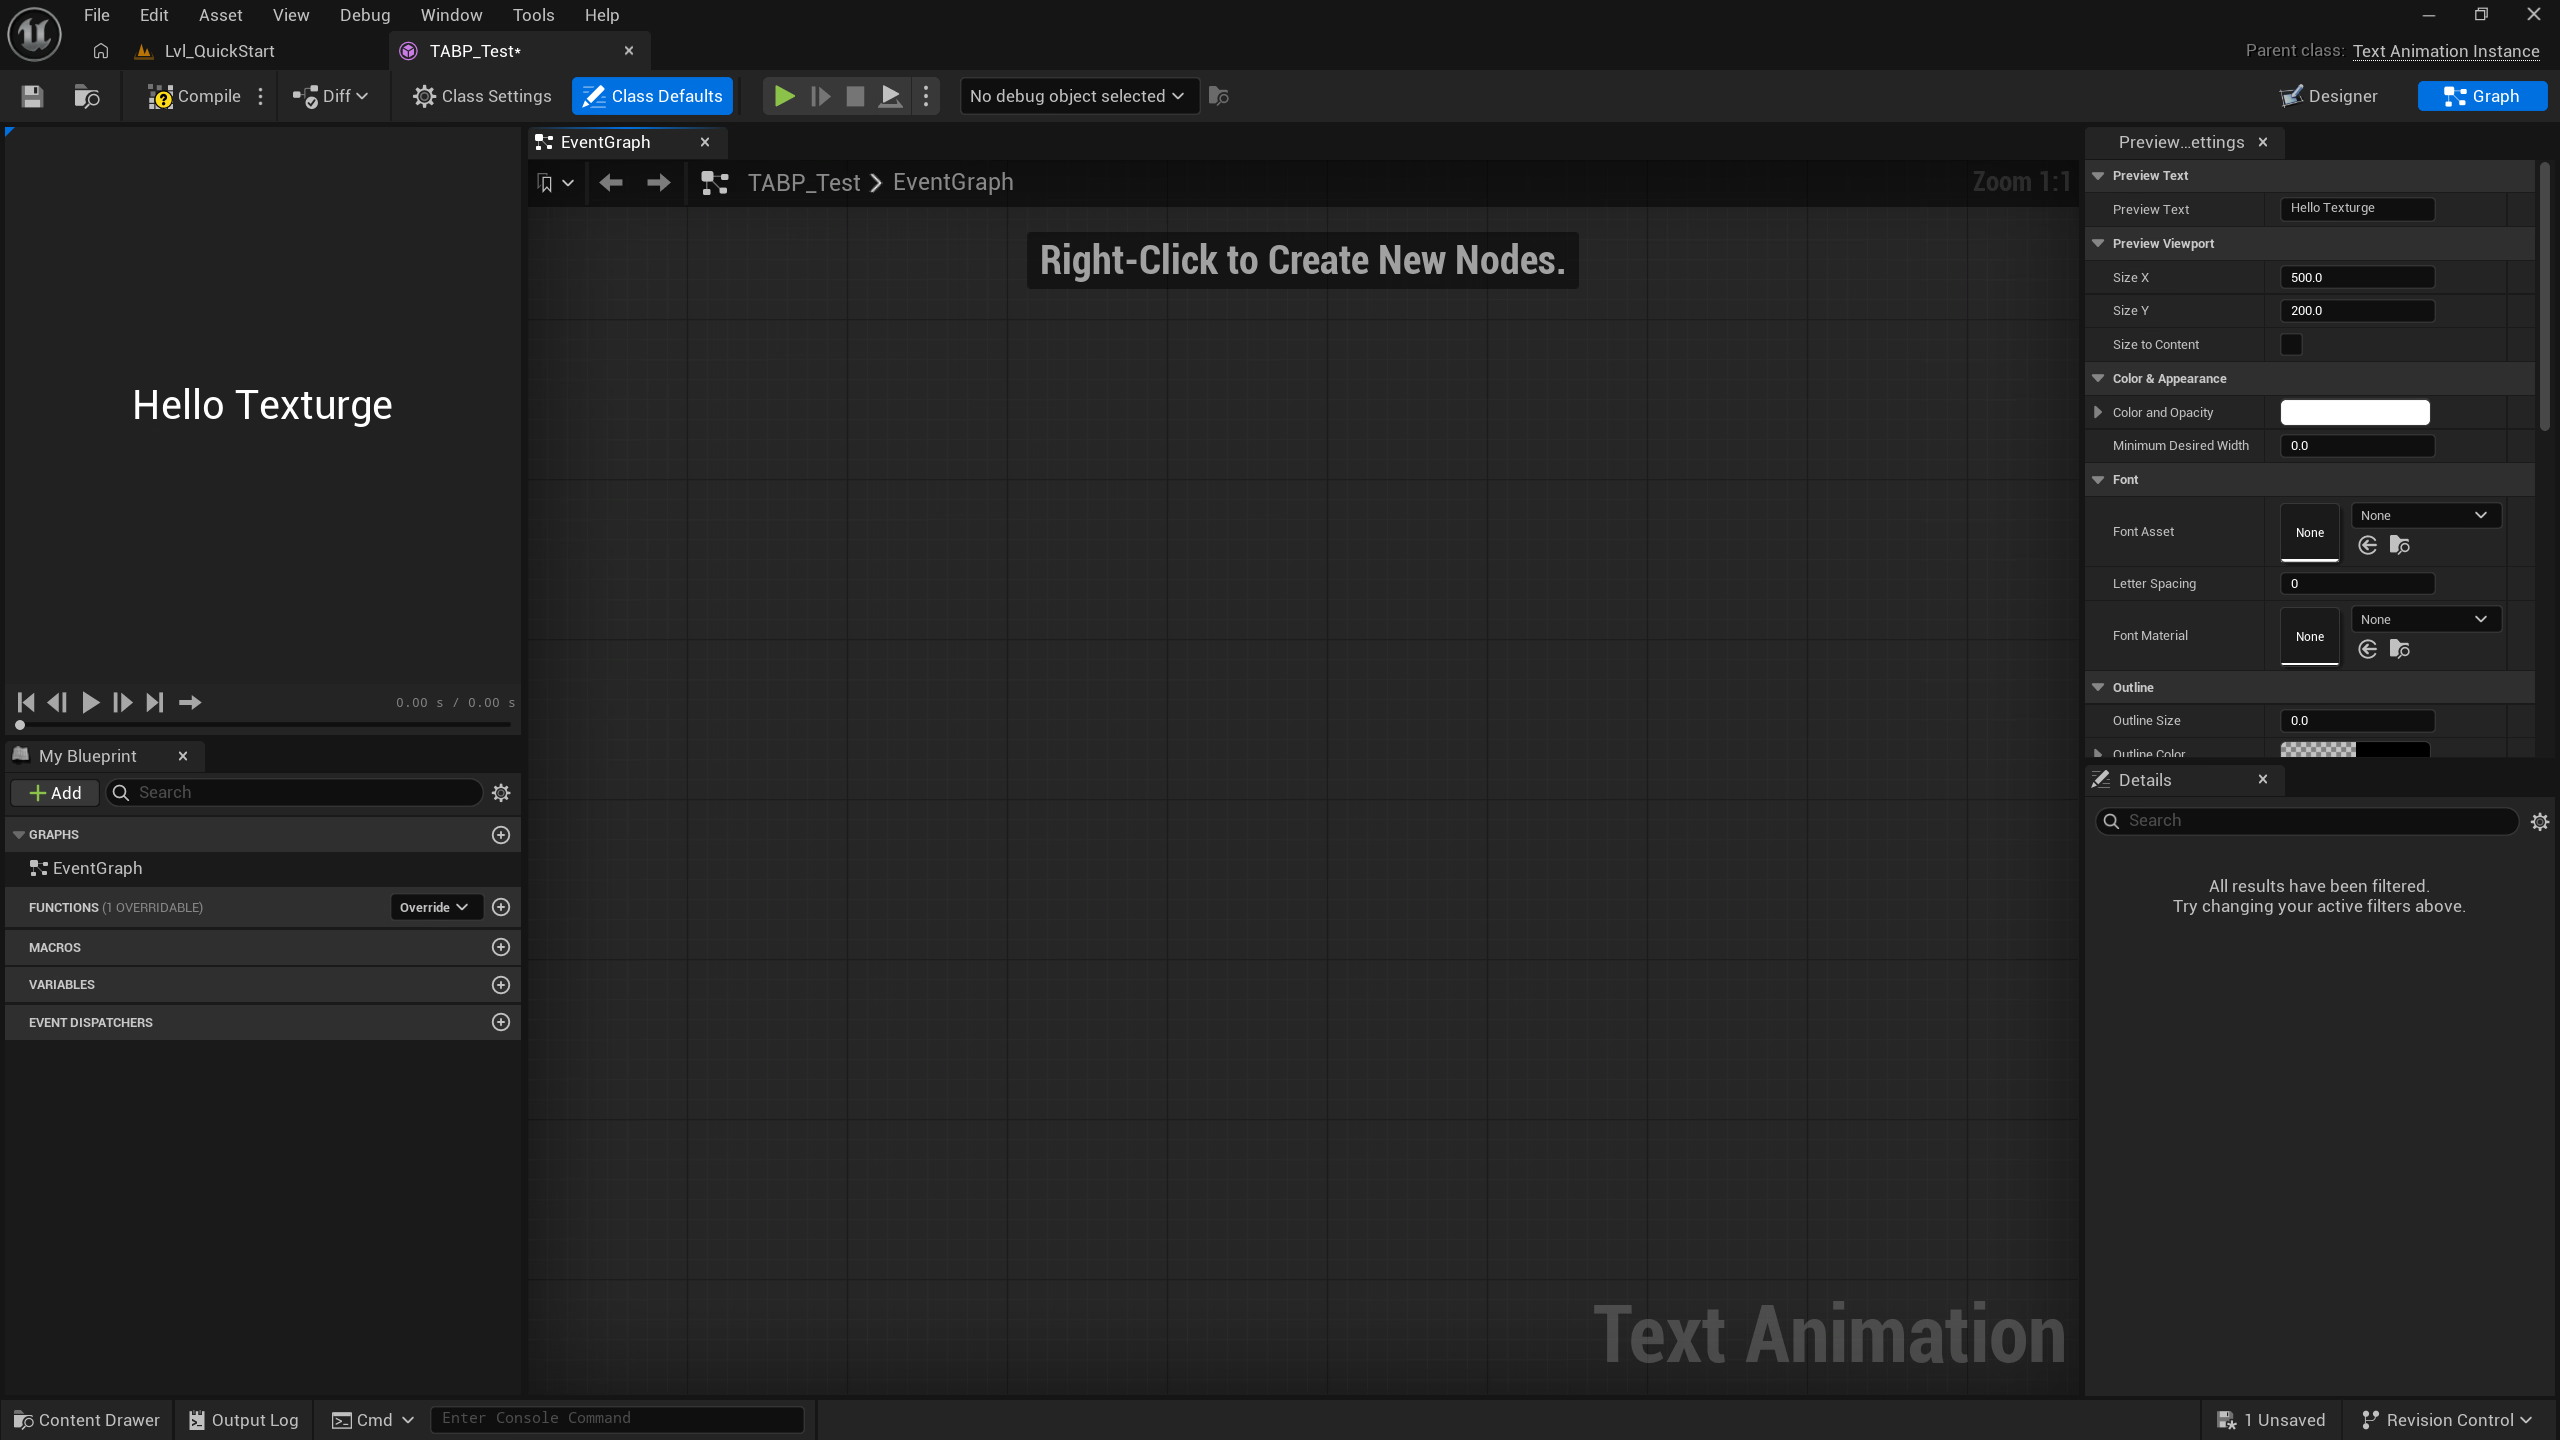
1. Switch to Graph Mode
- Switch to Graph mode in the text animation Blueprint editor
- Right-click in the event graph → Override → Build Default Animation
- Add the
Event BuildDefaultAnimationnode, which takesGlyphCountandTextas inputs
2. Override Flow
- Drag a glyph animation variable: directly drag an added
UGlyphAnimationvariable (e.g.TABP_Test) from the Blueprint variable list — no array indexing needed - Create the base layer: use
Create Glyph Animation Layer (Text), connect the glyph animation variable toGlyph Animation, connectTextfrom the event input, and chooseOverrideas the blend mode - Create the factory: use
Create Factory (Text)with the base layer andText; it builds the schedule automatically - Add overlay layers (optional): create additional layers with
Create Glyph Animation Layer (Text)usingAdditive/Multiply/CrossFade, then add them to the factory withAdd Layer - Factory-level post-processing (optional): use nodes such as
Multiply Glyph Translation/Add Glyph Rotationfor global tweaks - Bake and return: call
Bakeand connect the returnedFBakedStageto the event’s return value
Only use
Build Schedule Infoand nodes likeSet Glyph Delay/Set Start Delaywhen you need advanced per-glyph control such as staggering, skipping whitespace, or classification-based scheduling.
3. Key Points
GlyphAnimationsmust contain at least one valid asset; otherwise the default implementation returns an empty stage- Every Layer/Factory node returns itself, so calls can be chained
- Factory-level overrides apply once to the final combined state and are not multiplied by the number of layers
Index = -1means the operation applies to all glyphs
Compiling the Animation Blueprint
Applies to: compiling the Blueprint after configuration to generate runtime baked data.
- Click the Compile button in the toolbar
FTextAnimationBlueprintCompilerContextruns Kismet compilation, generating aUTextAnimationBlueprintGeneratedClassand incrementingCompileCount- After compilation the cache invalidates and the preview source auto-switches (None → Glyph Animation), triggering a re-bake
- Observe the animation in the preview viewport
NOTE
The preview text is only for real-time editor preview and does not affect the actual display text of
UAnimatedTextBlockat runtime. Runtime text is controlled independently by the widget’sTextproperty.
Using in UMG
Applies to: binding the compiled animation Blueprint to a UMG widget.
Creating the Widget
- Right-click in the Content Browser > User Interface > Widget Blueprint, name it
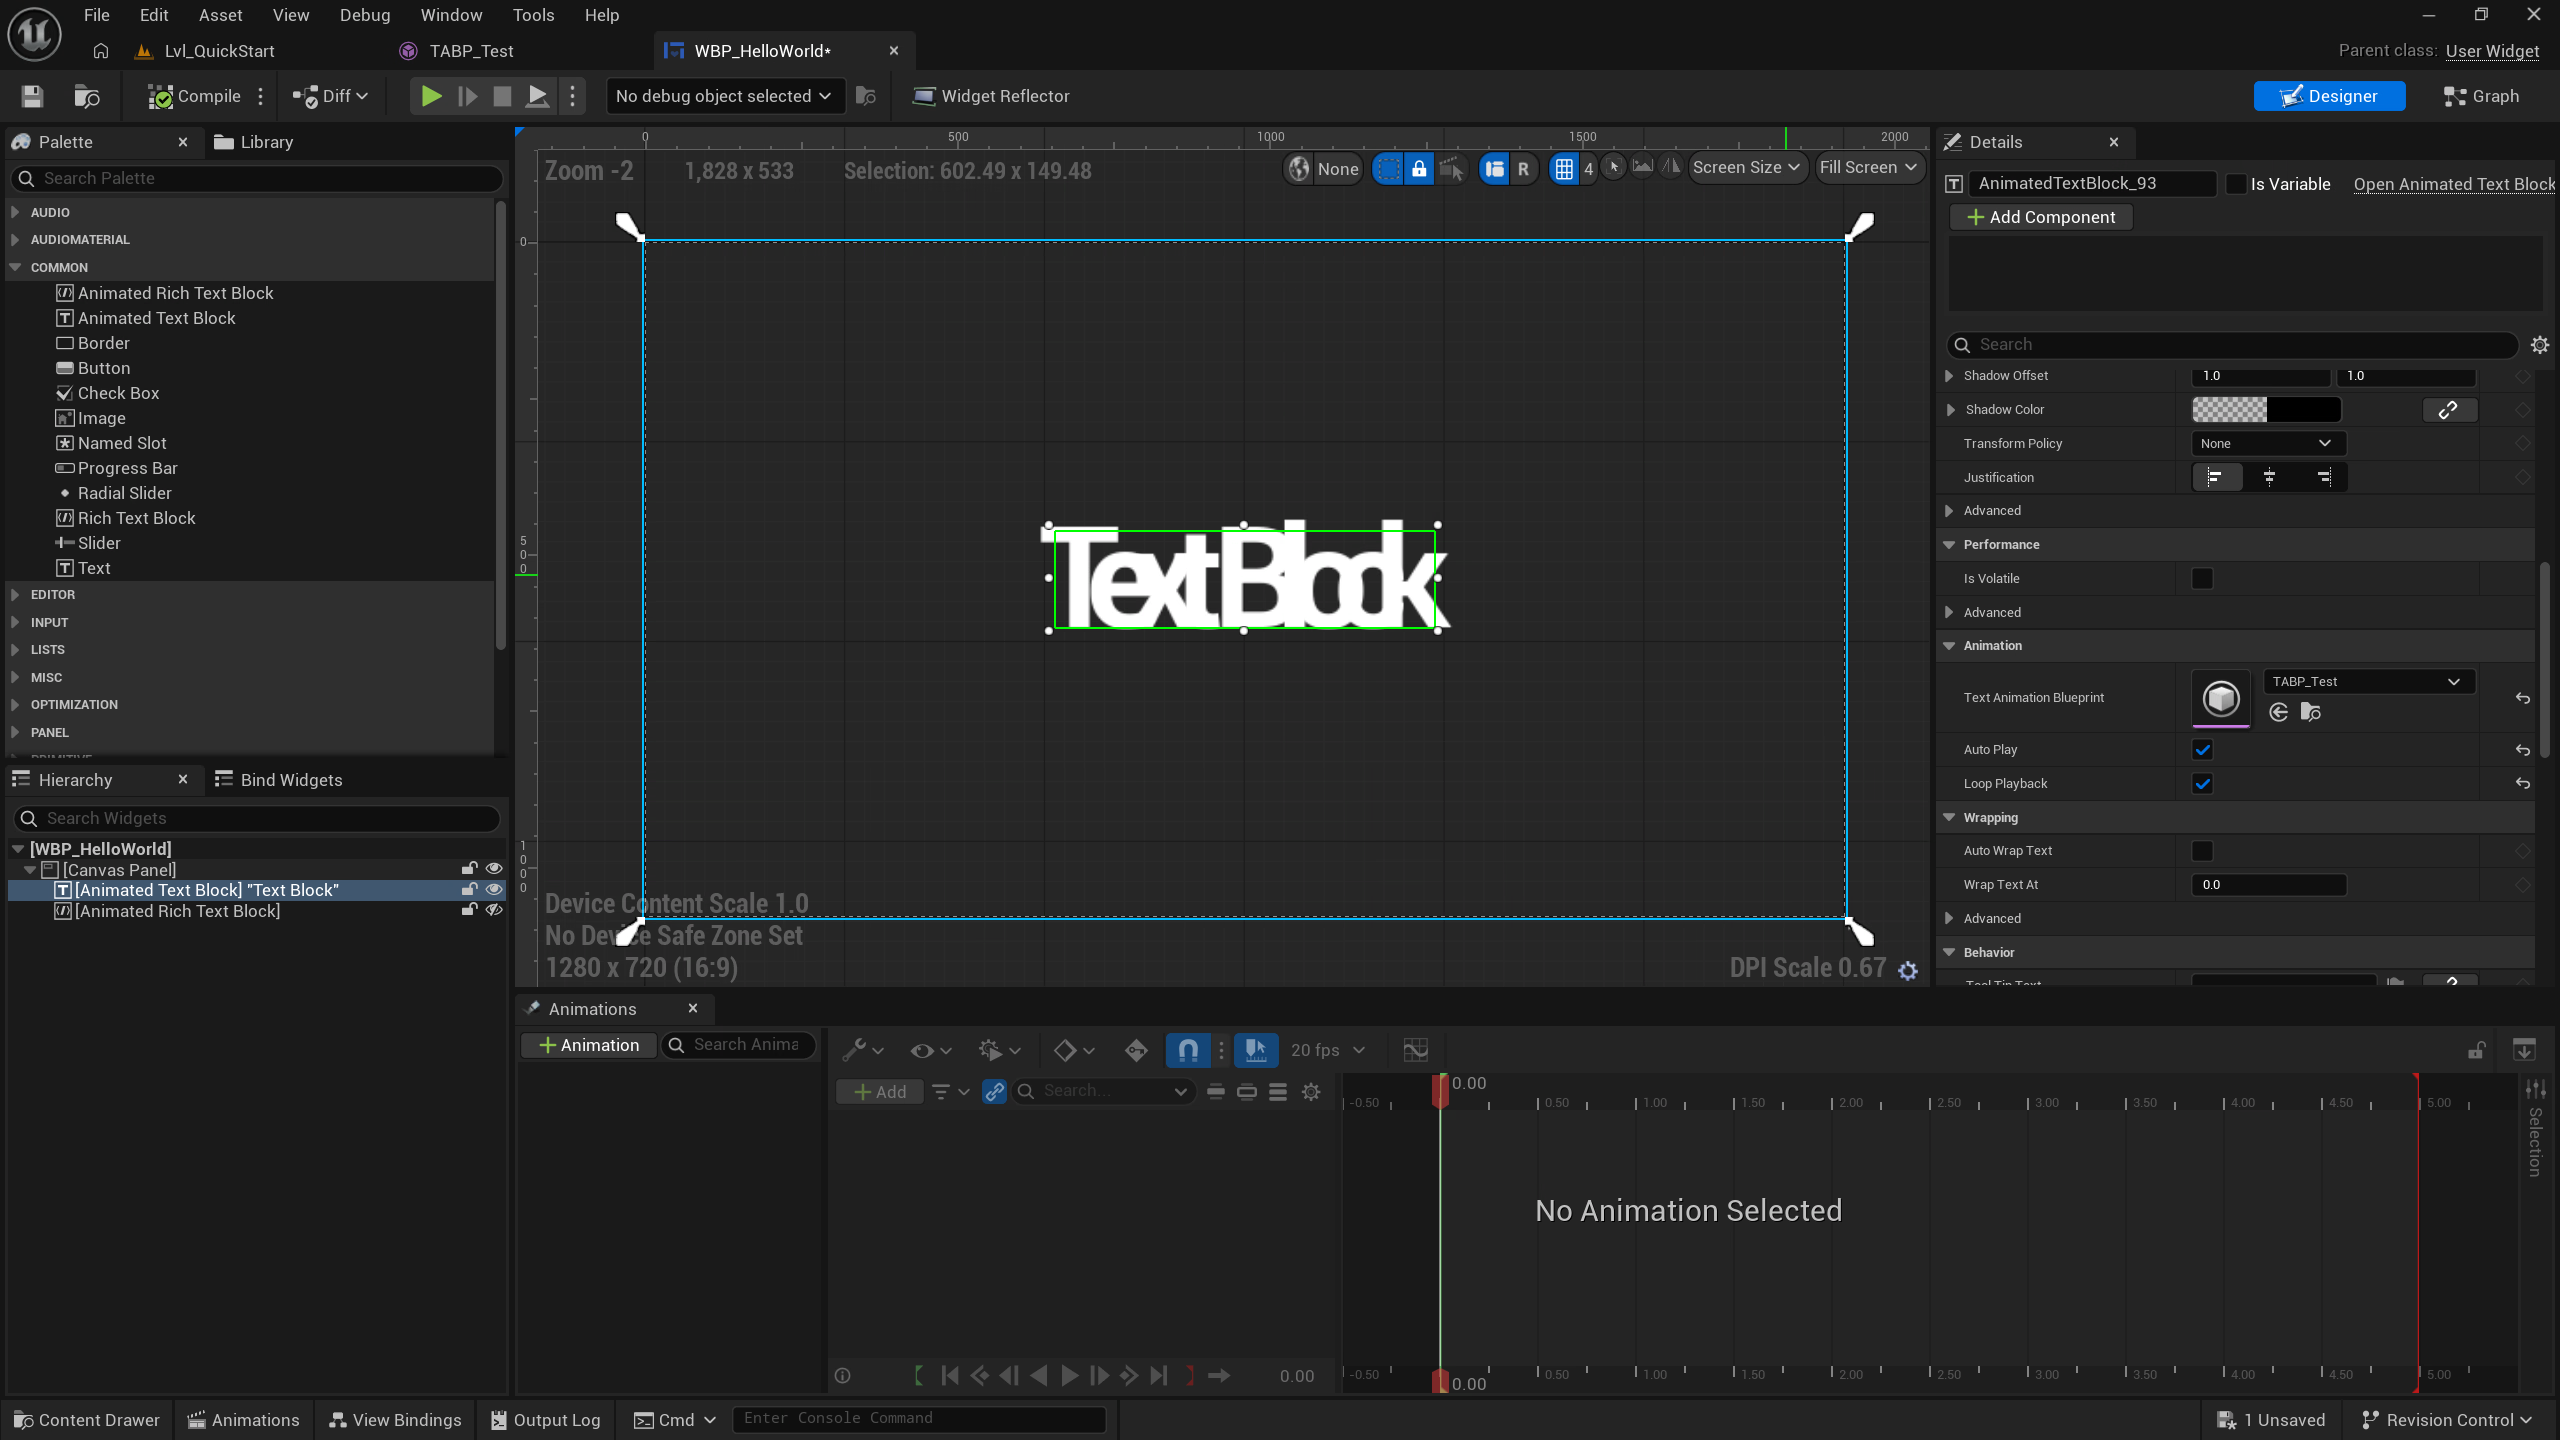
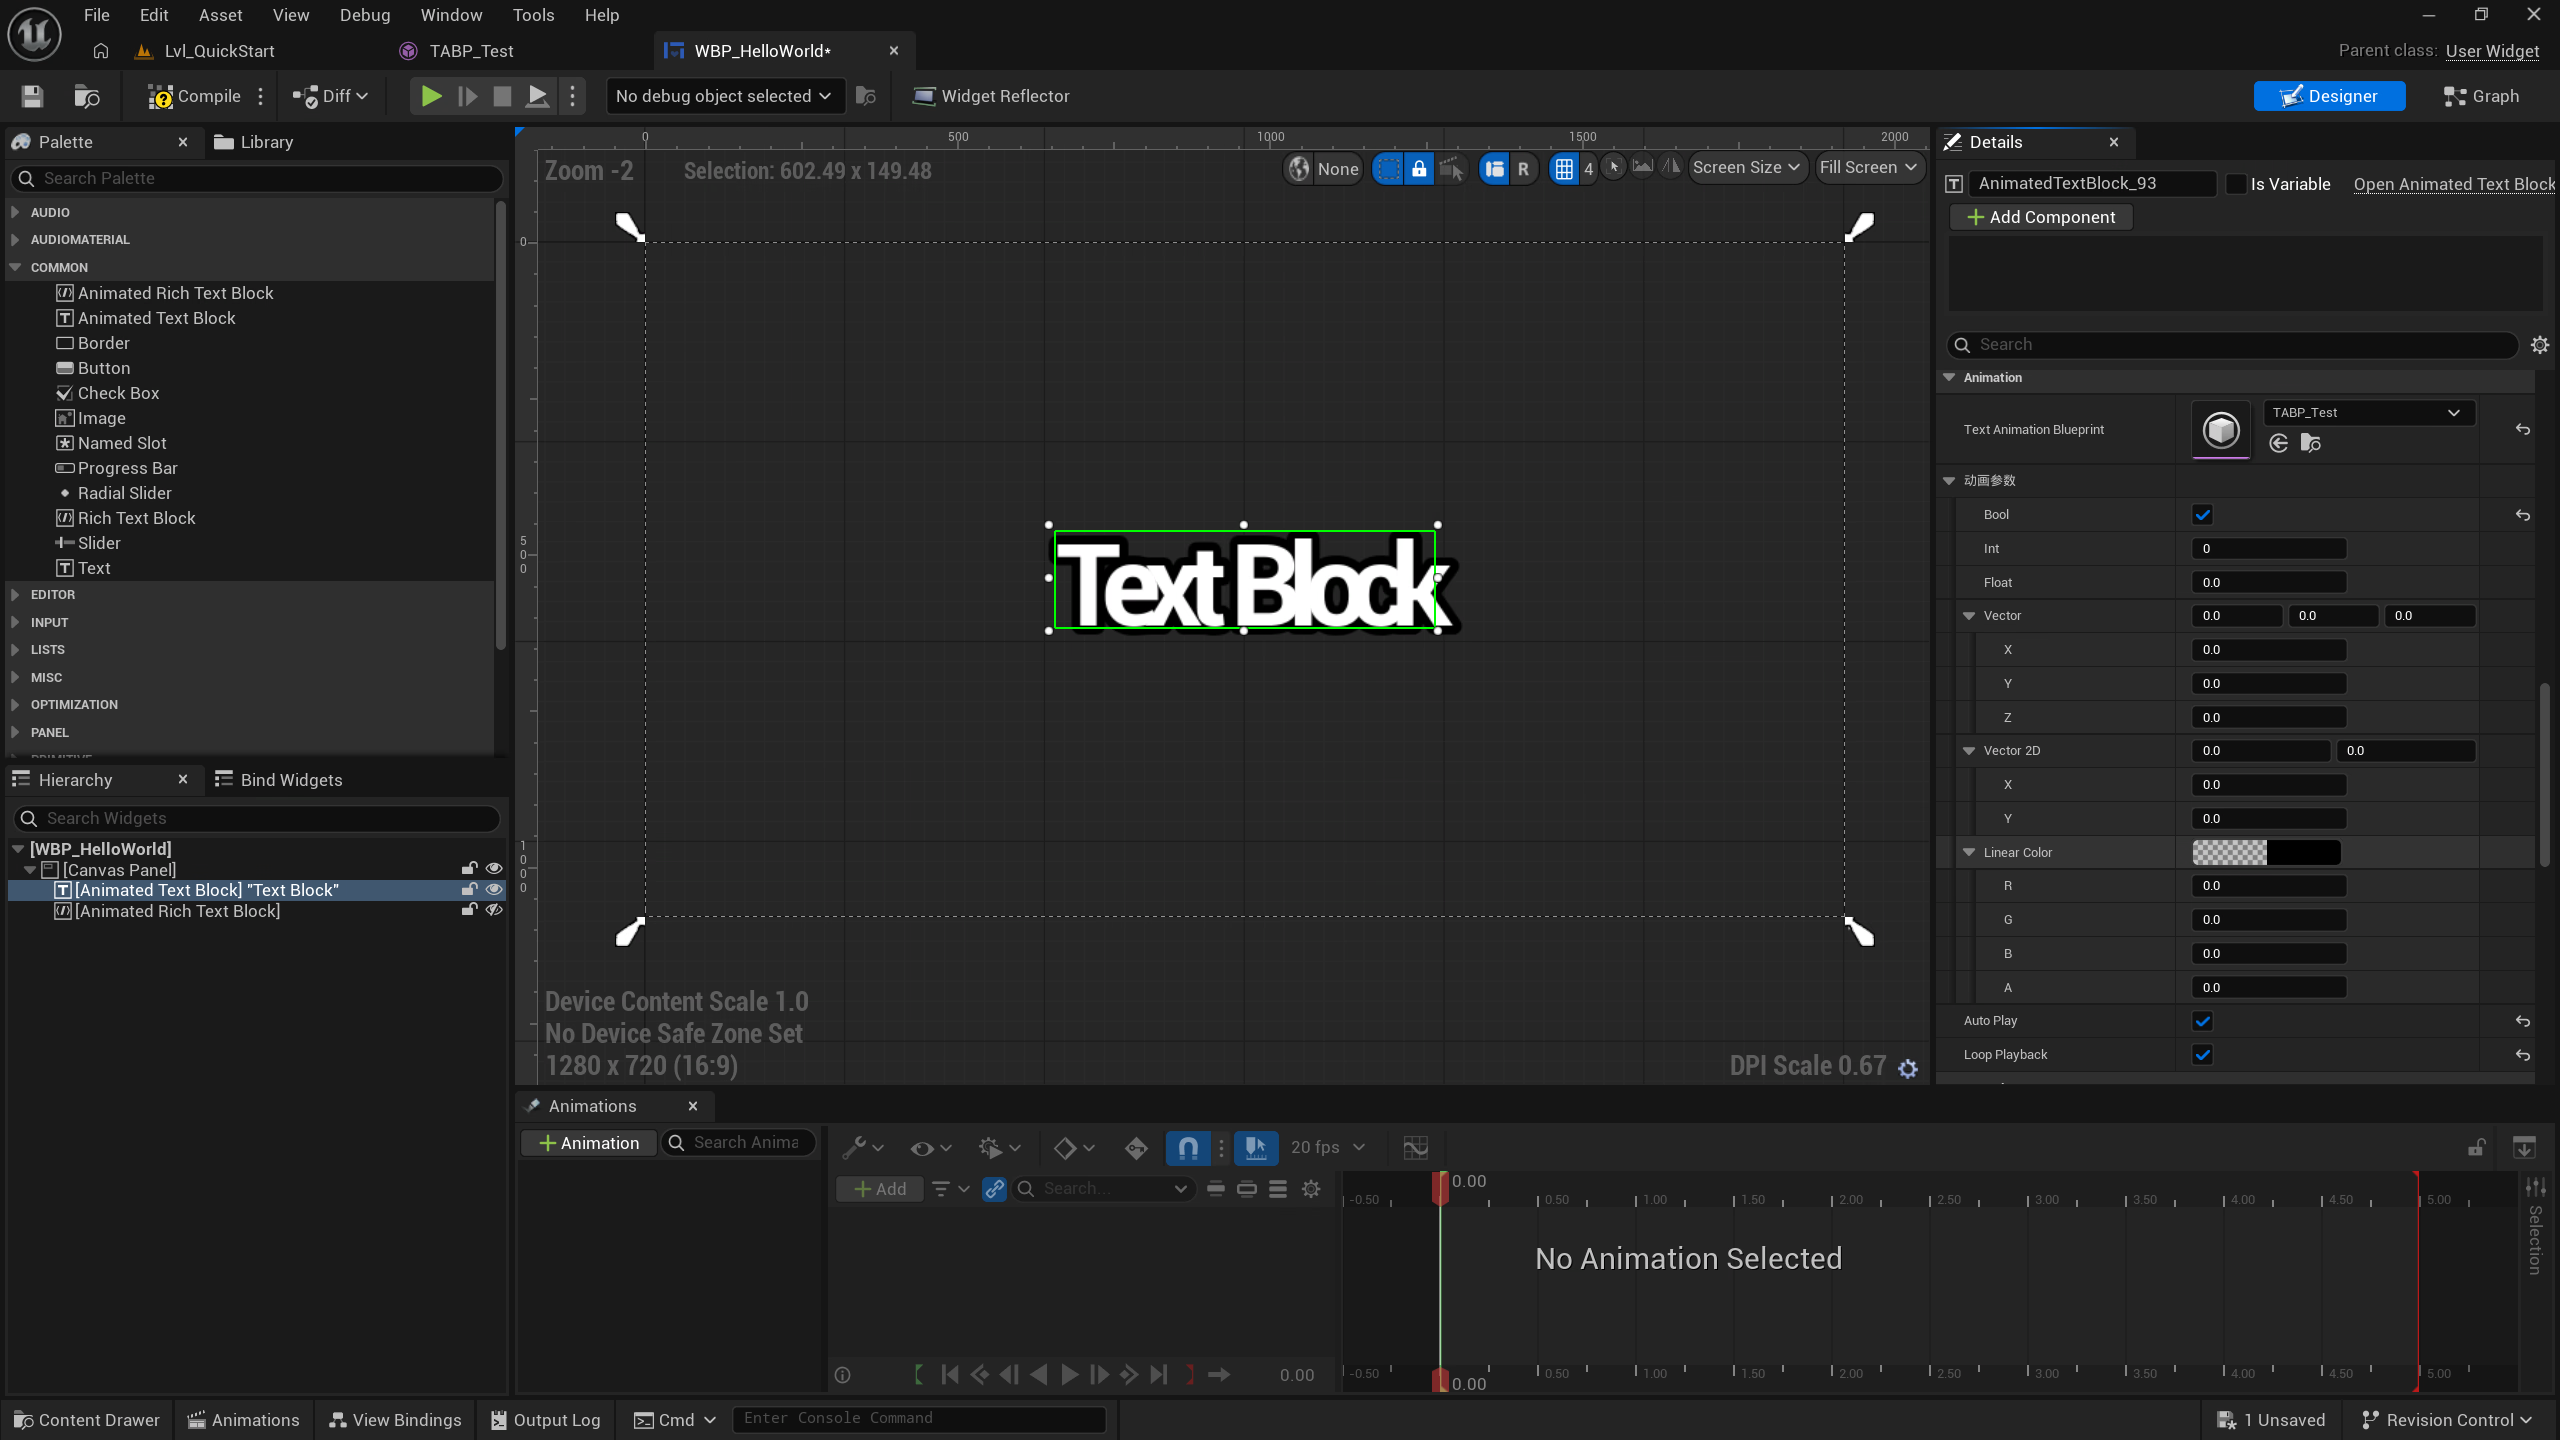
WBP_HelloWorld - Search for Animated Text Block in the Palette and drag it onto the canvas
- Adjust the widget’s size and position
Binding the Animation Blueprint
- Select the Animated Text Block widget (
UAnimatedTextBlock) on the canvas and set Text Animation Blueprint toTABP_Testin the Details panel - Set the Text property to the runtime display text
- Optional: check Auto Play or Loop Playback
- Compile and save the widget
Fine-Tuning via Parameter Overrides
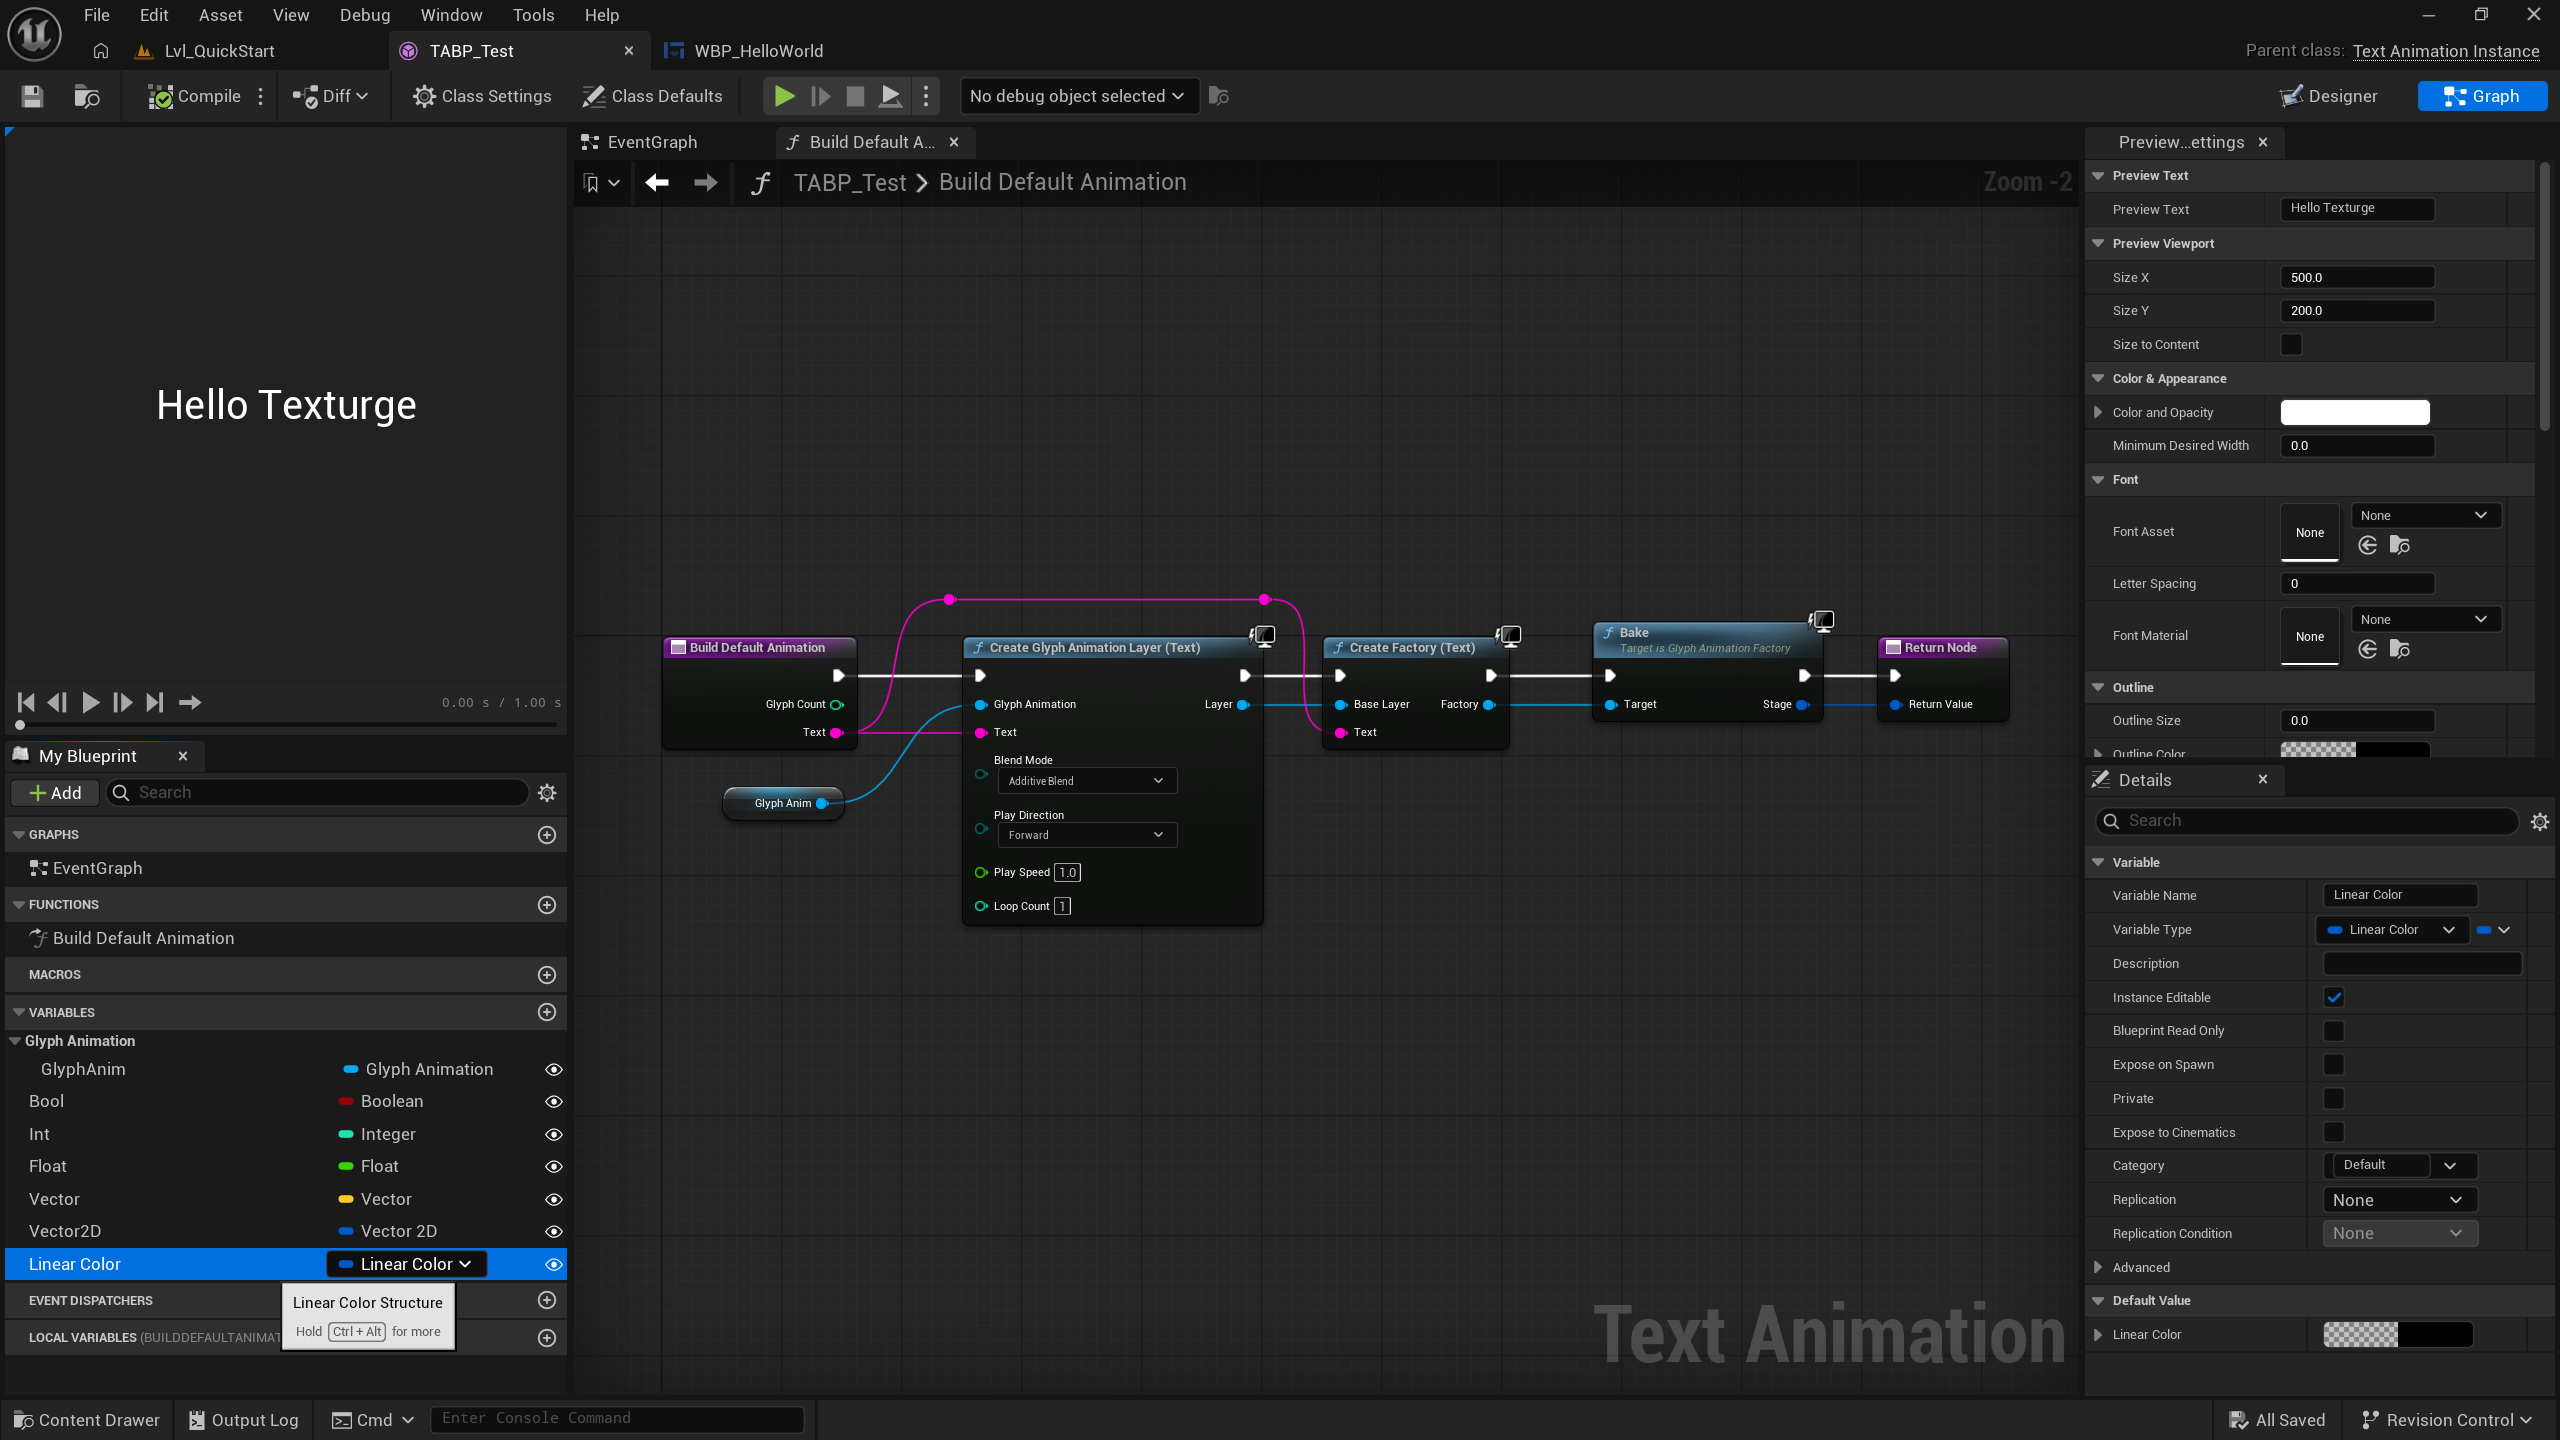
Expand the 6 override maps under Instance Parameter Overrides (UAnimParameterOverrides) in the Details panel to override Blueprint default variables per widget instance:
| Override group | Key | Value type |
|---|---|---|
| Float Overrides | variable name | float |
| Int Overrides | variable name | int32 |
| Bool Overrides | variable name | bool |
| Vector Overrides | variable name | FVector |
| Color Overrides | variable name | FLinearColor |
| Vector2D Overrides | variable name | FVector2D |
Each variable row has a Reset button (restores the Blueprint default; the CDO is never modified).
Testing
Applies to: verifying actual in-game playback in PIE.
- Create the widget in a level and add it to the viewport (Level Blueprint:
Event BeginPlay→Create Widget→Add to Viewport) - Run PIE (
Alt+P) - The text plays according to the animation defined by the animation Blueprint
Runtime Control
Applies to: dynamically controlling playback and parameters in Blueprint or C++.
UAnimatedTextBlock Blueprint nodes:
Play/Pause/Resume/Stop/Skip to End/Is AnimatingSet Blueprint Variable(6 overloads: Float/Int/Bool/Vector/Color/Vector2D) — modify animation parameters at runtime, triggering a cooldown re-bake (3 frames)- Events:
Glyph Revealed (Blueprint),Animation Complete (Blueprint)
NOTE
VariableNamemust match a variable declared in the animation Blueprint’s Class Defaults (FNamecomparison is case-insensitive). For int32 / bool use theSet Blueprint Variable (Int)/Set Blueprint Variable (Bool)overloads.
At this point you have completed the full authoring workflow from asset creation to runtime playback.
TIP
Publish your custom animation as a preset: after finishing, configure a tag entry for it in a Data Asset to reuse it in rich text via
<anim id="...">tags just like the built-in presets. Continue with”Multi-Layer Animation”and”Advanced Effects”for further learning.